Christmas Tree Build Guide
Parts List
Here’s a list of parts needed for the build:
-
1 x Christmas Tree Keyboard Kit
Kit Includes:
- 2 x Tree Trunk PCBs
- 1 x Tree Base PCB
- 1 x Acrylic Base Plate
- 2 x 1N4148 Diodes
- 6 x 4.7k Resistors
- 6 x 100R Resistors
- 6 x 4.7uF Capacitors
- 6 x Transistors
- 2 x Kailh Hot Swap Sockets
- 1 x Tactile Switch
- 1 x Power Position Switch
- 12 x Red LEDs
- 12 x Green LEDs
- 12 x Yellow LEDs
- 4 x 6mm Screws
- 4 x 4mm Screws
- 4 x Brass Standoffs
Not included in the kit but required to complete:
Build Steps
- Solder Resistors
- Solder Transistors
- Solder Capacitors
- Solder LEDs
- Solder Base Button
- Solder Base Switch
- Solder Base Diodes
- Solder Base Sockets
- Solder Base Controller
- Assemble Acrylic Bottom Plate Case
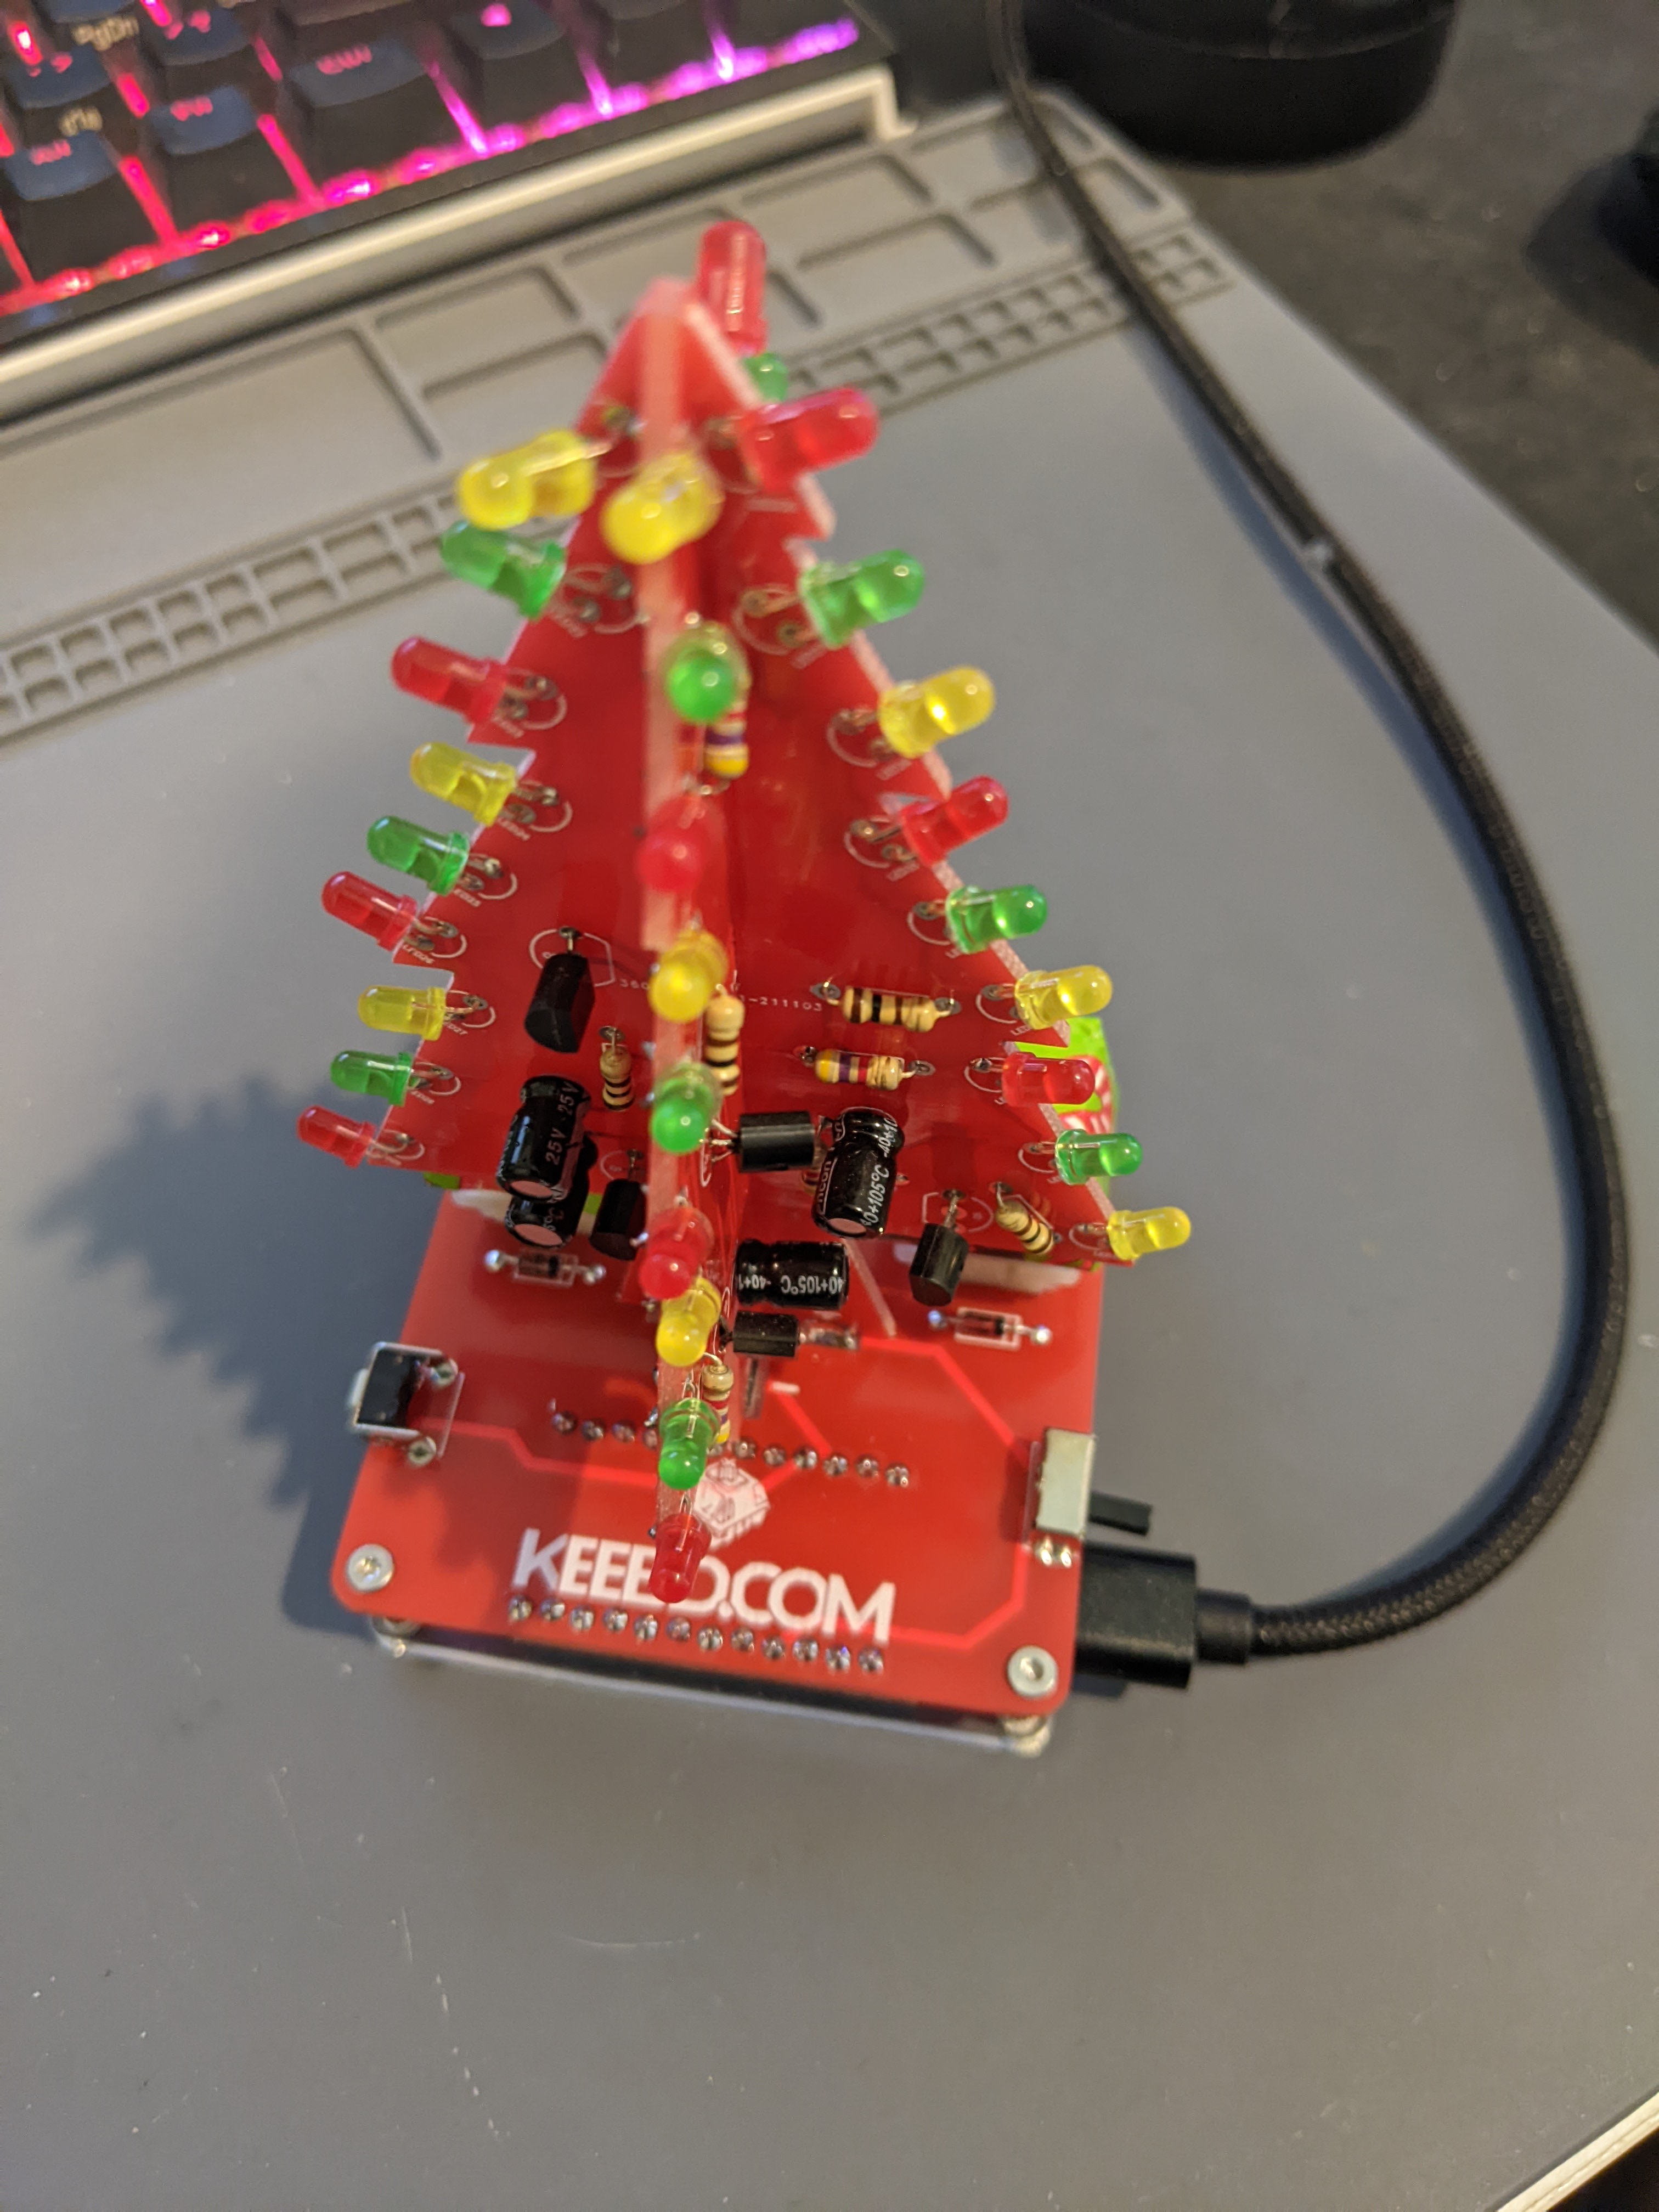
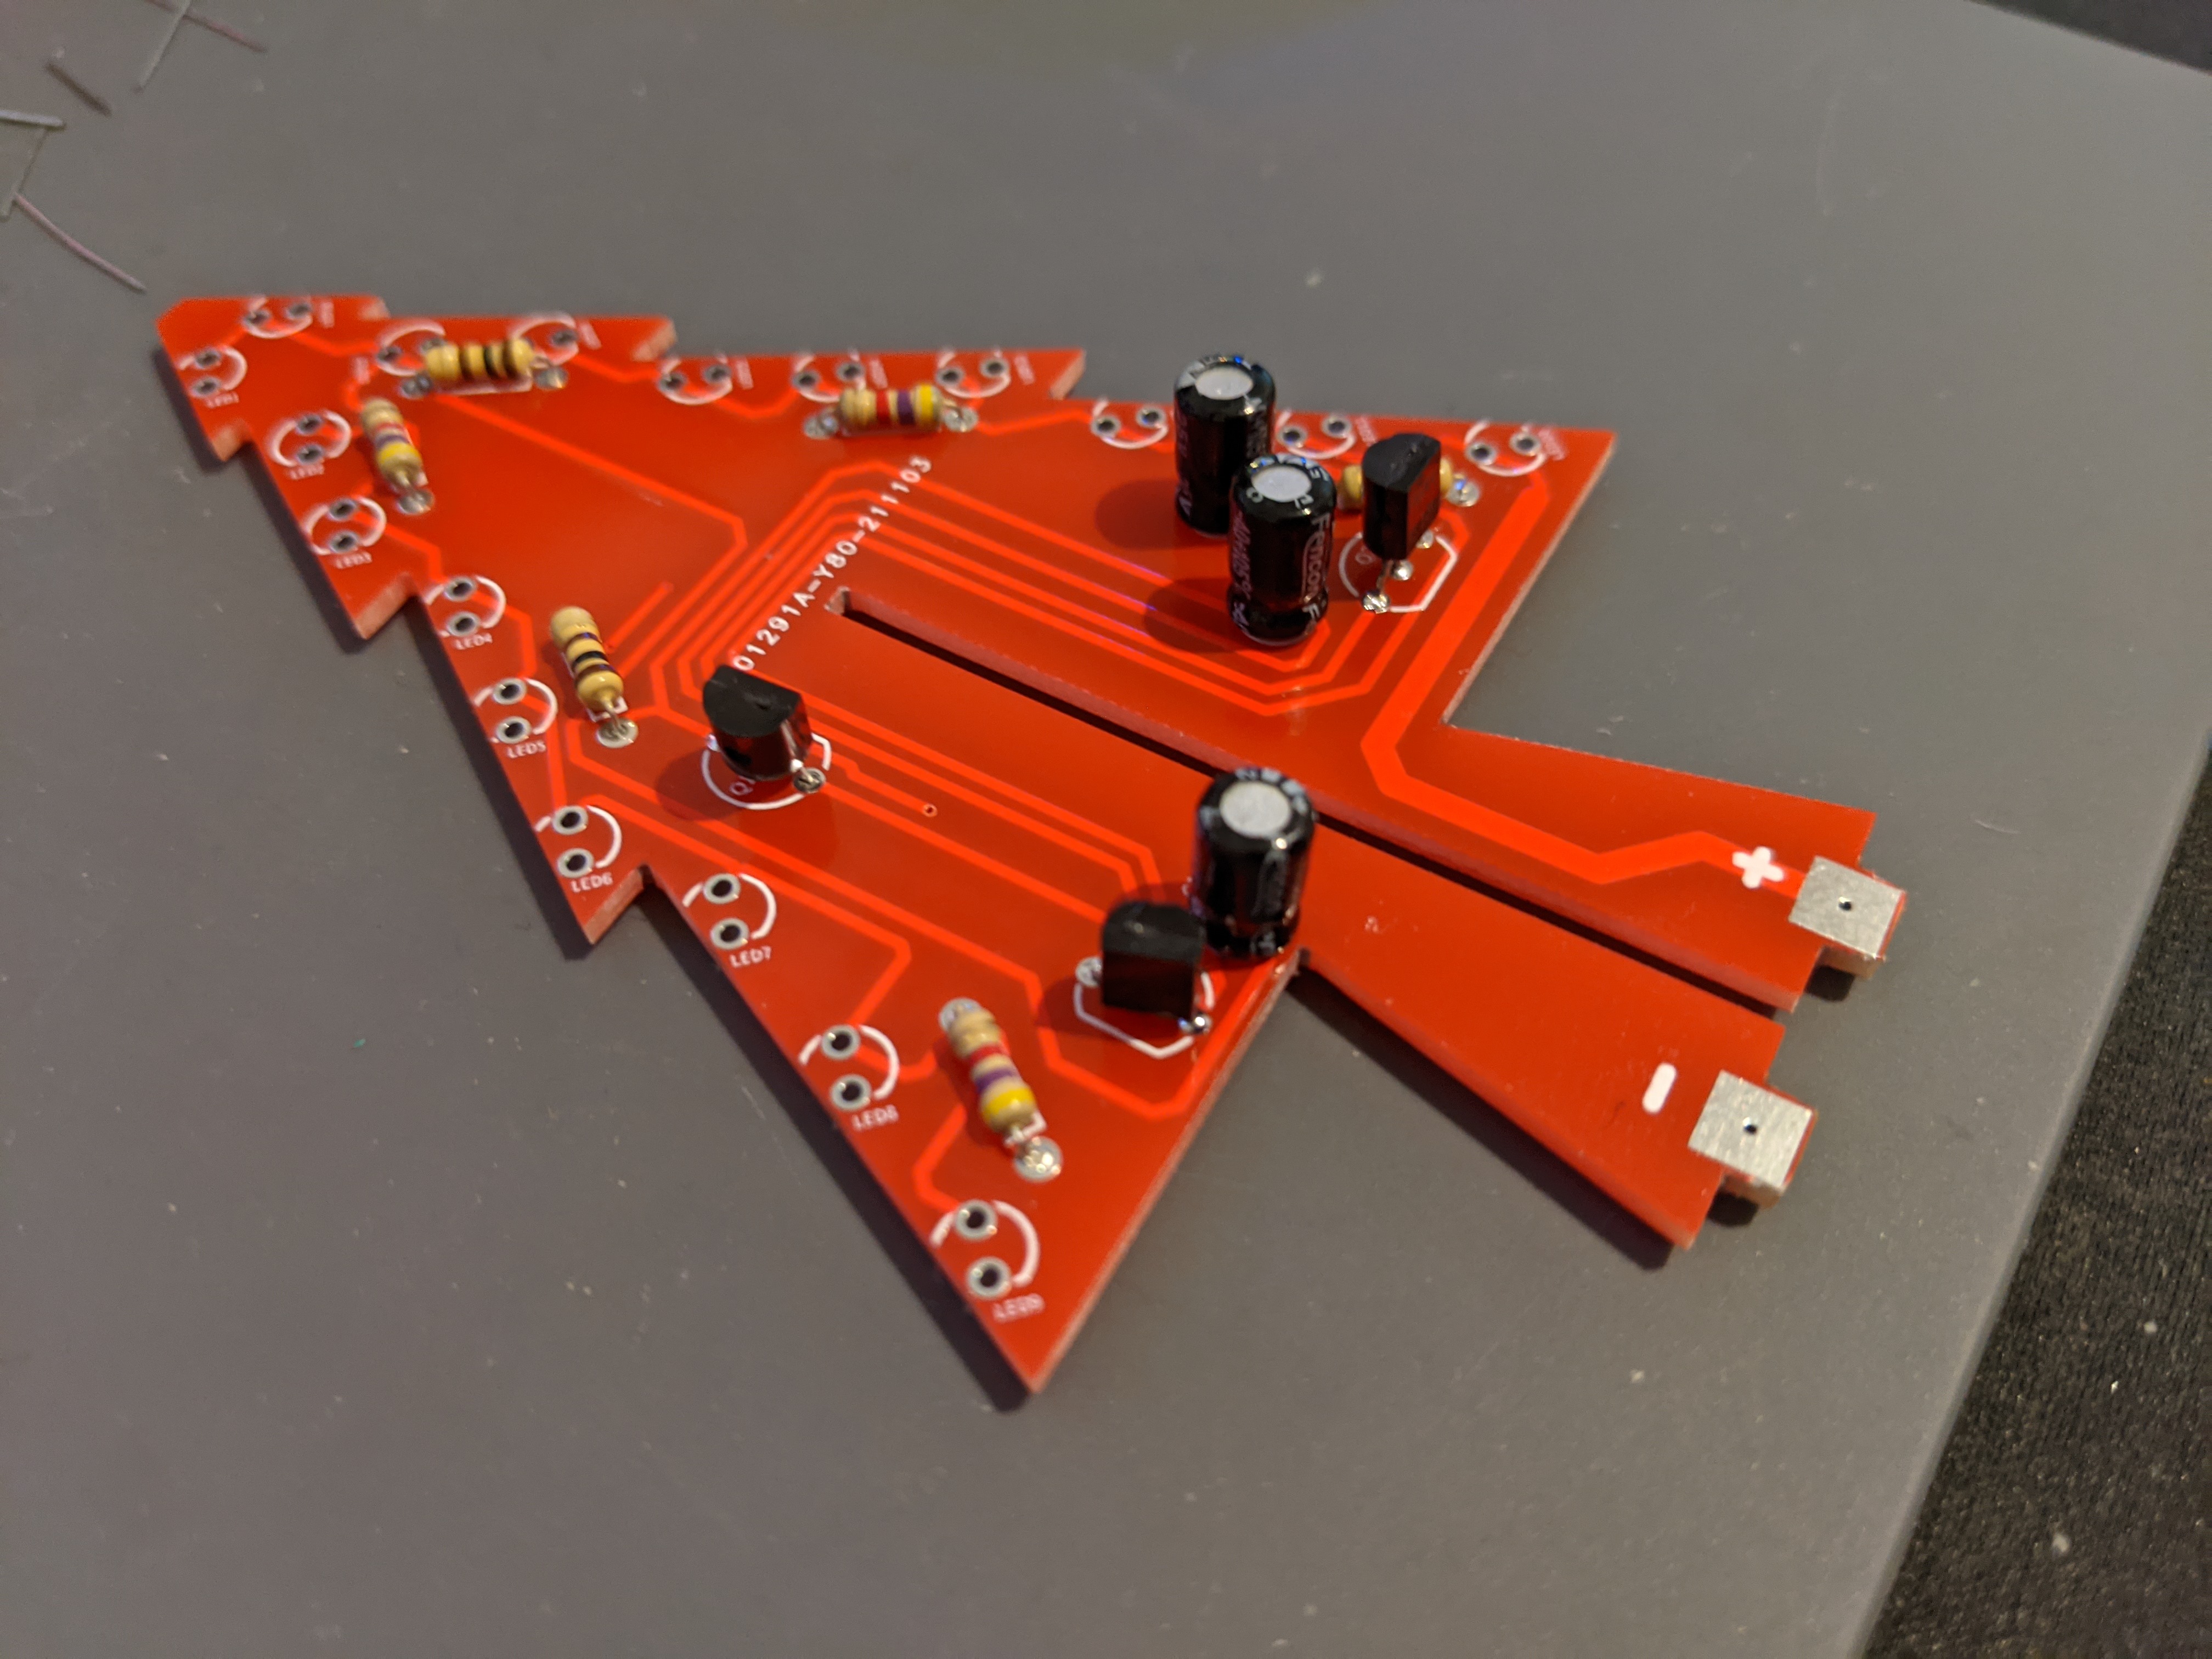
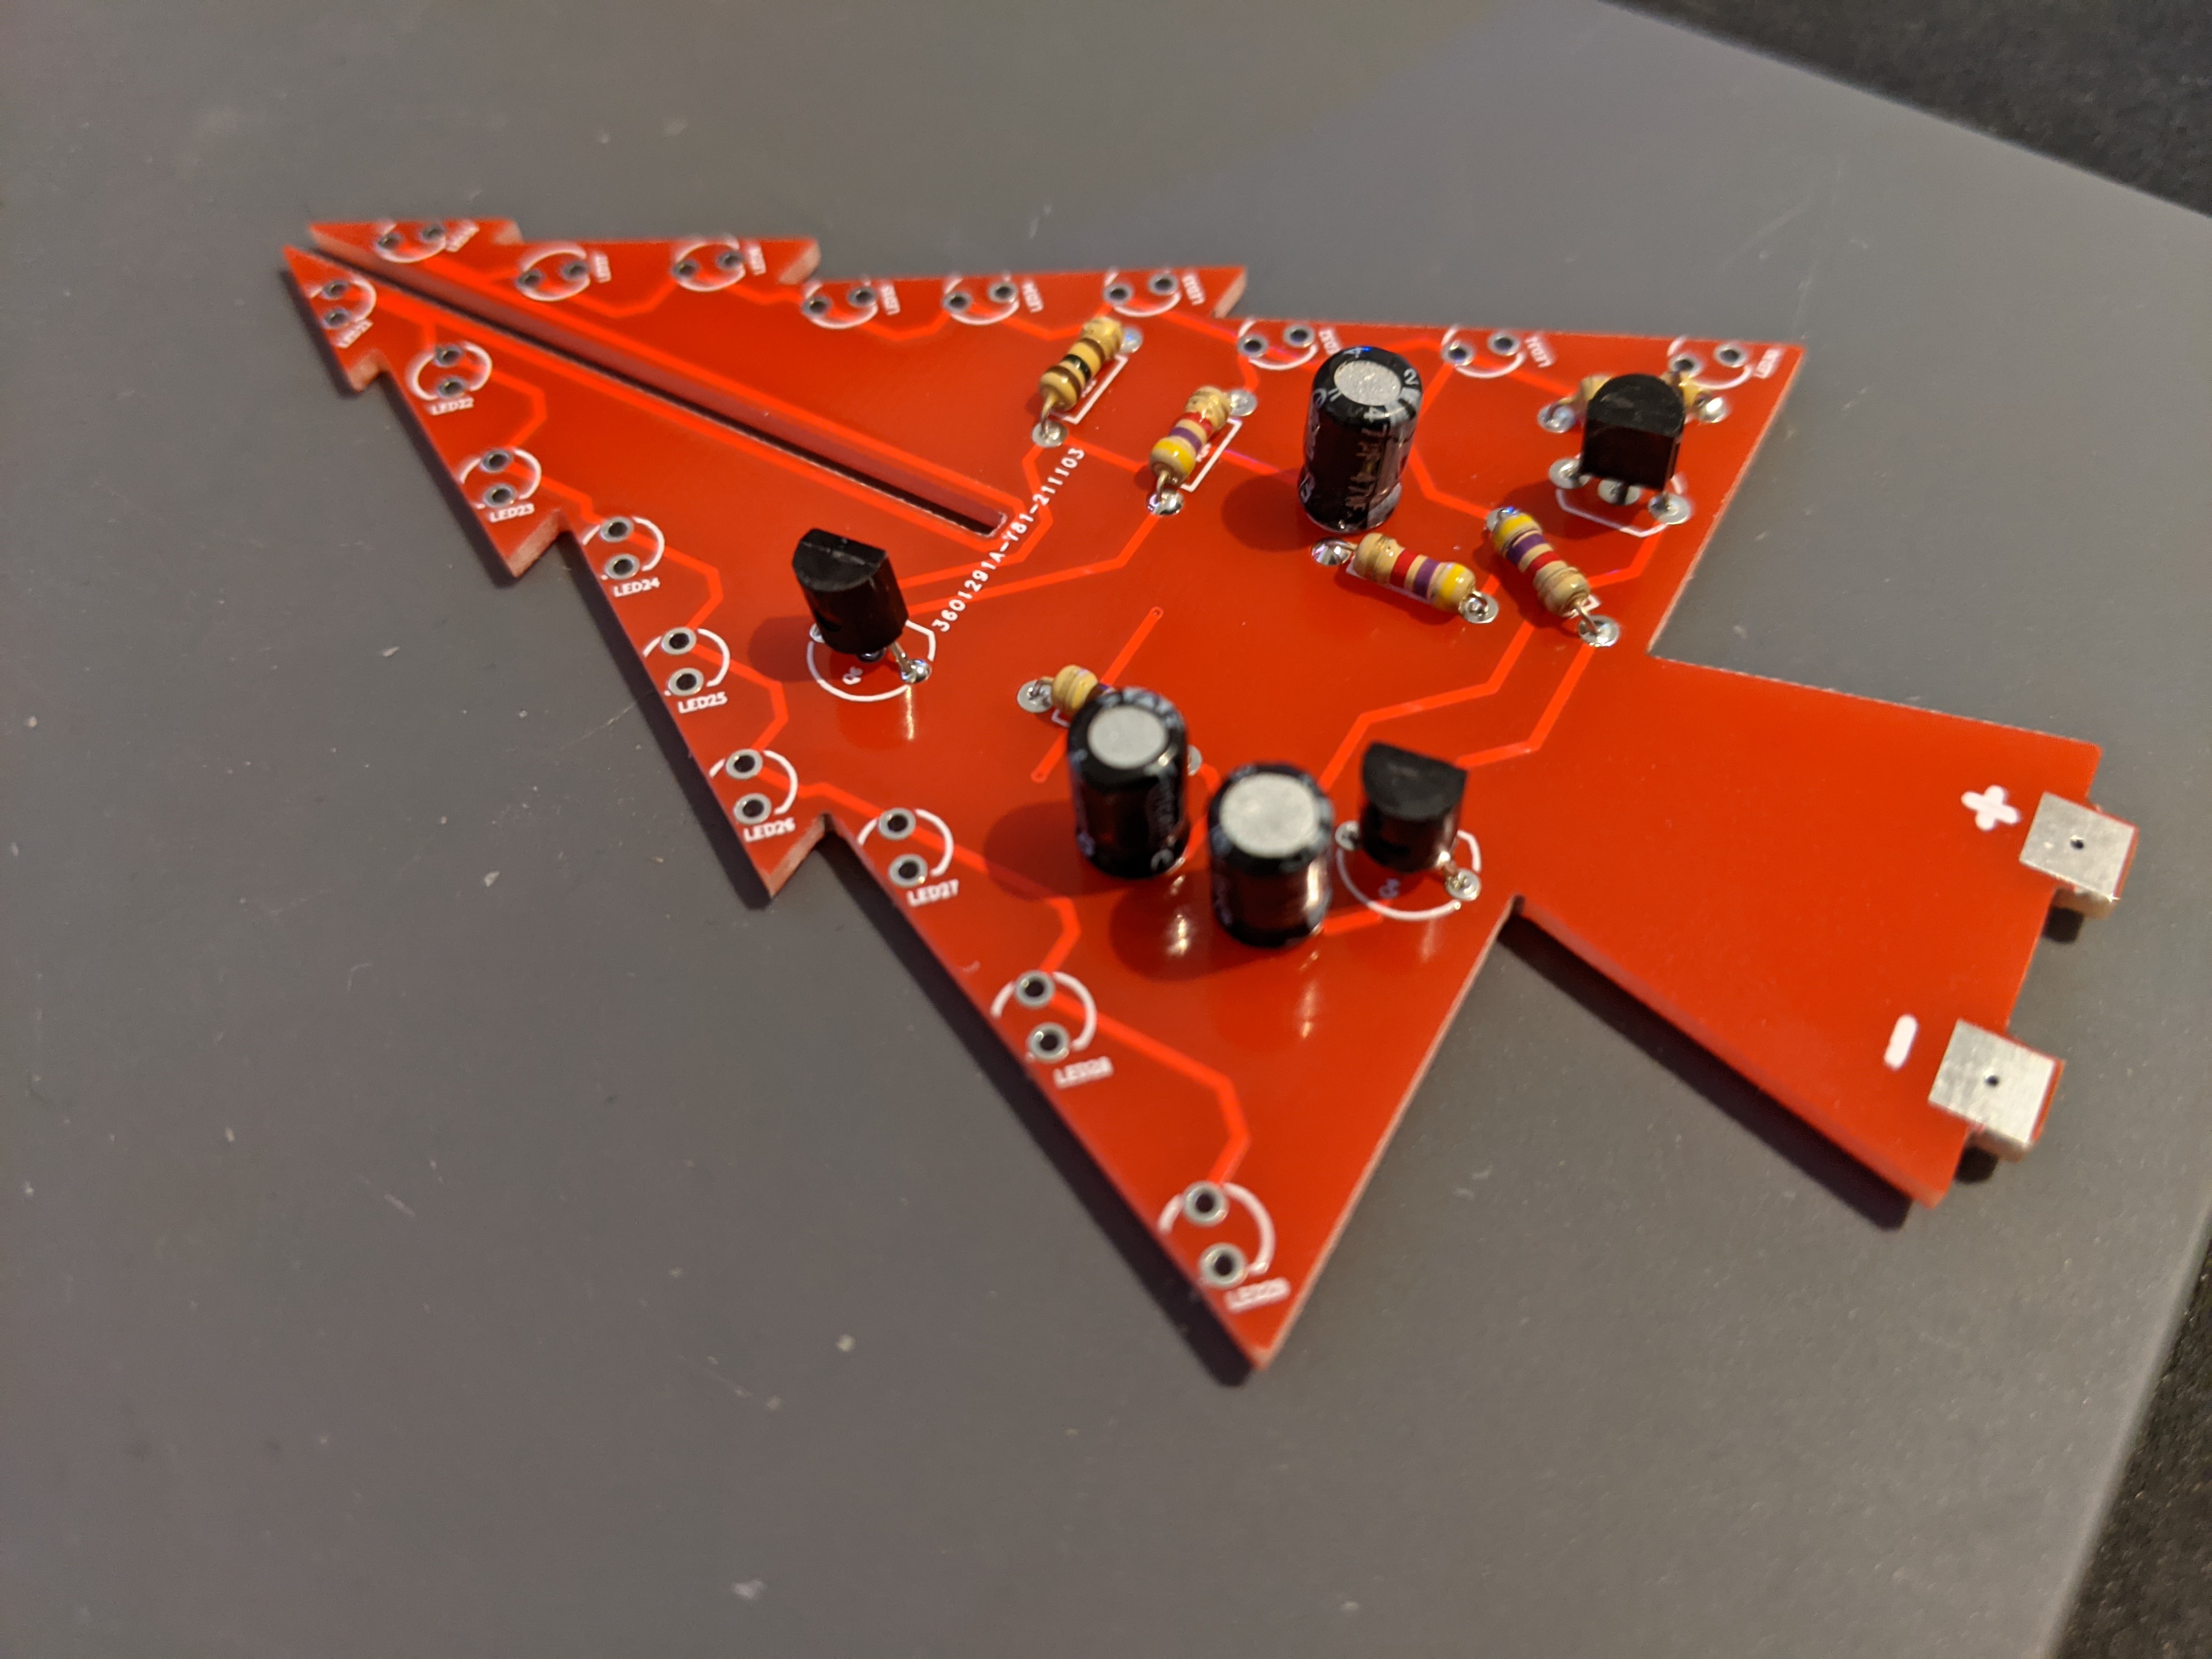
Solder Resistors
We will start by soldering the resistors to the two Tree Trunk PCBs
Resisotrs can be soldered in any direction
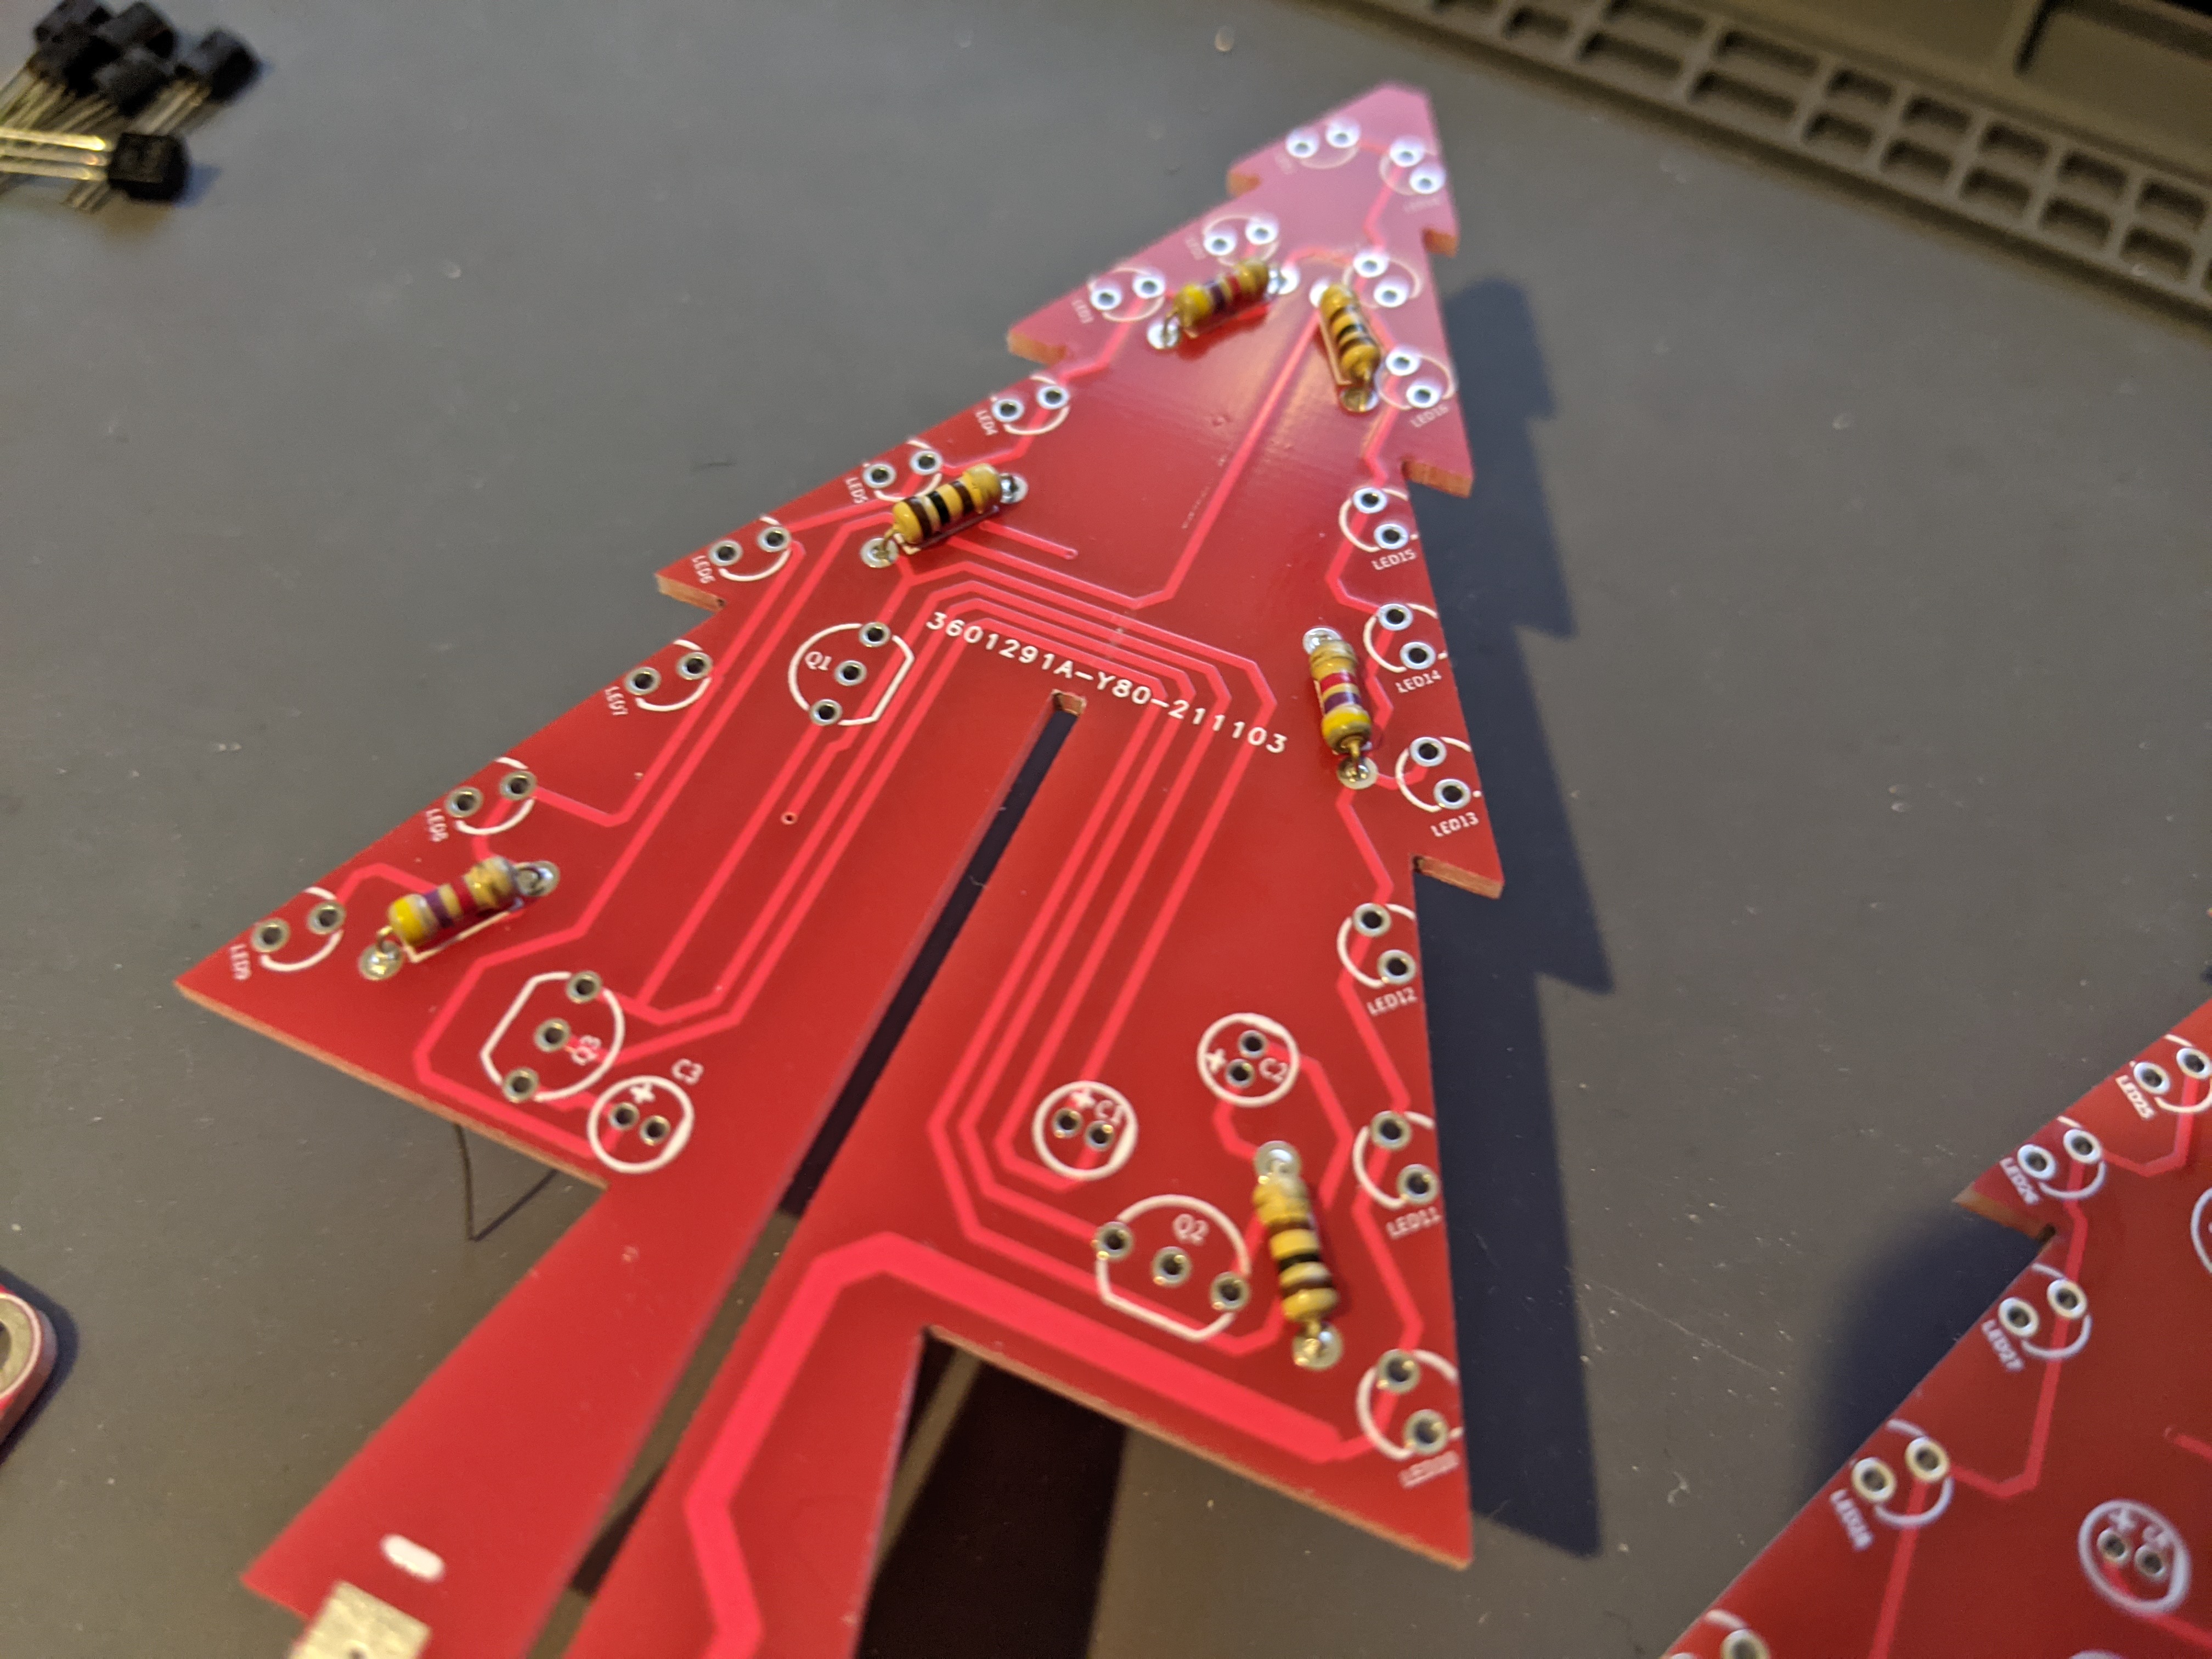
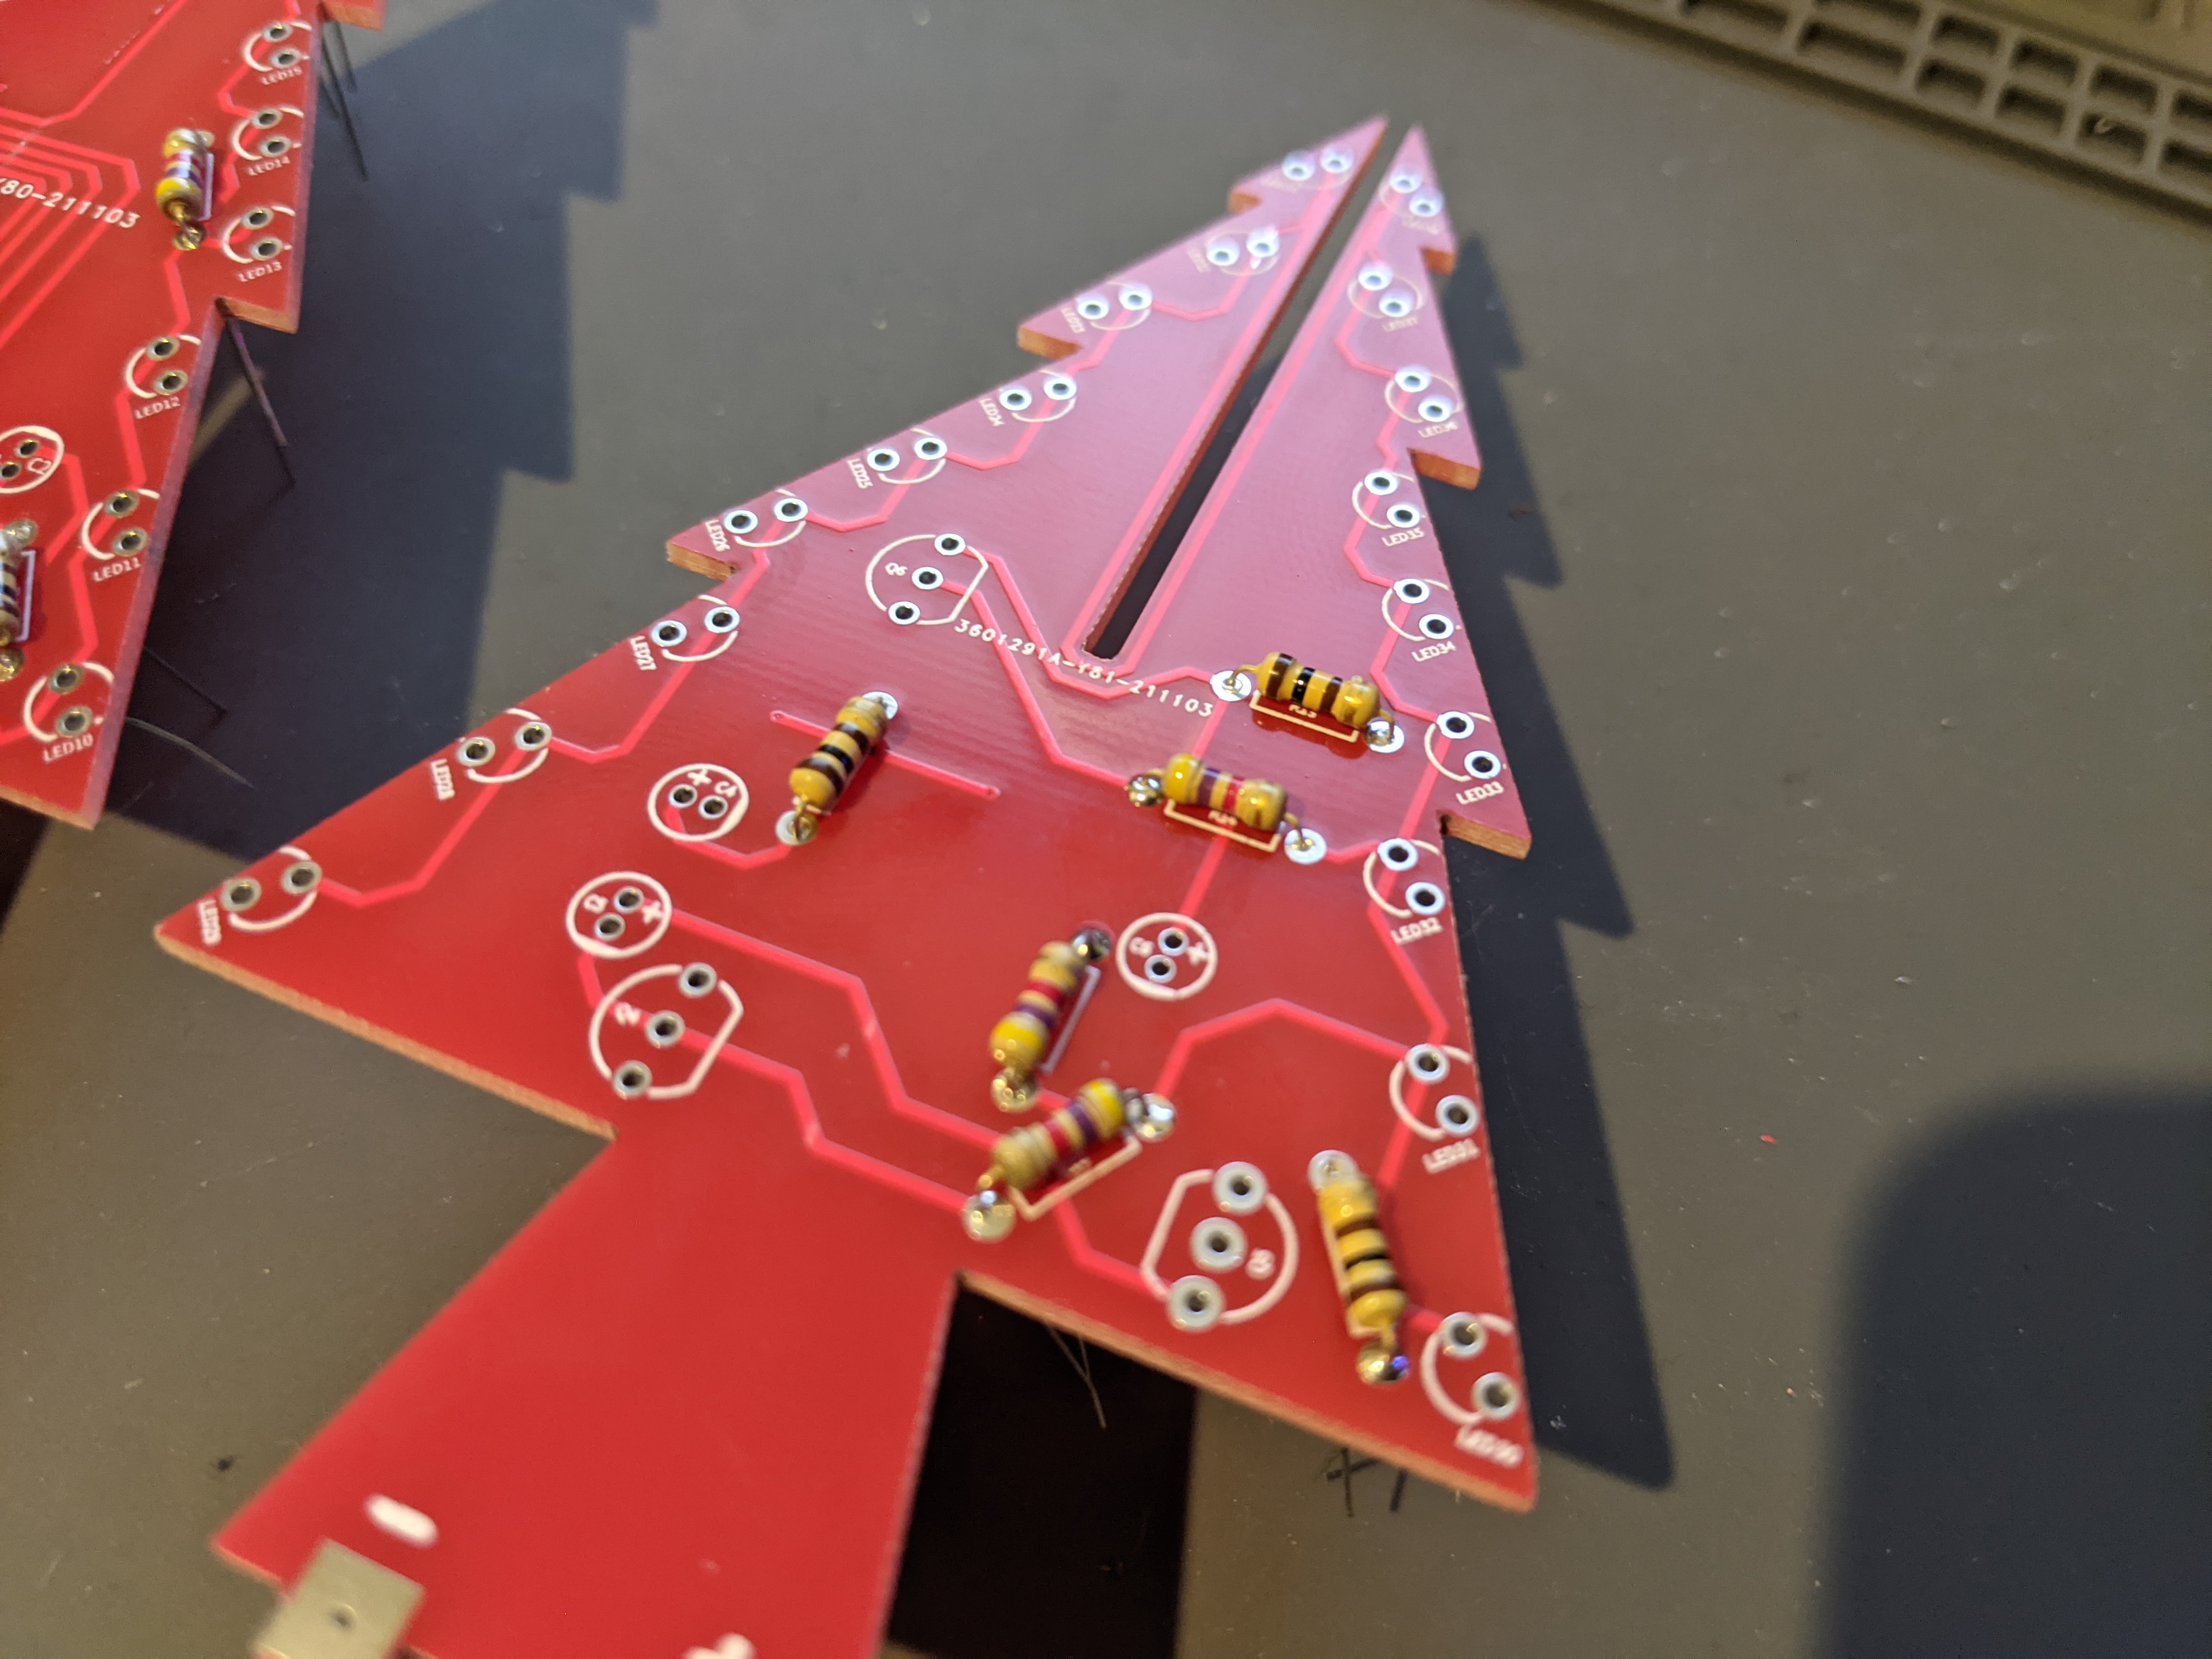
Solder Transistors
Solder the Transistors to the two Tree Trunk PCBs
The flat side of the transistor must face the direction of the flat line on the PCB
![]()
![]()
Solder Capacitors
Solder the Capcitors to the two Tree Trunk PCBs
The white line on the side of the capacitor must line up with the white line on the PCB (the square pad opposite to the pad with a plus (+) sign
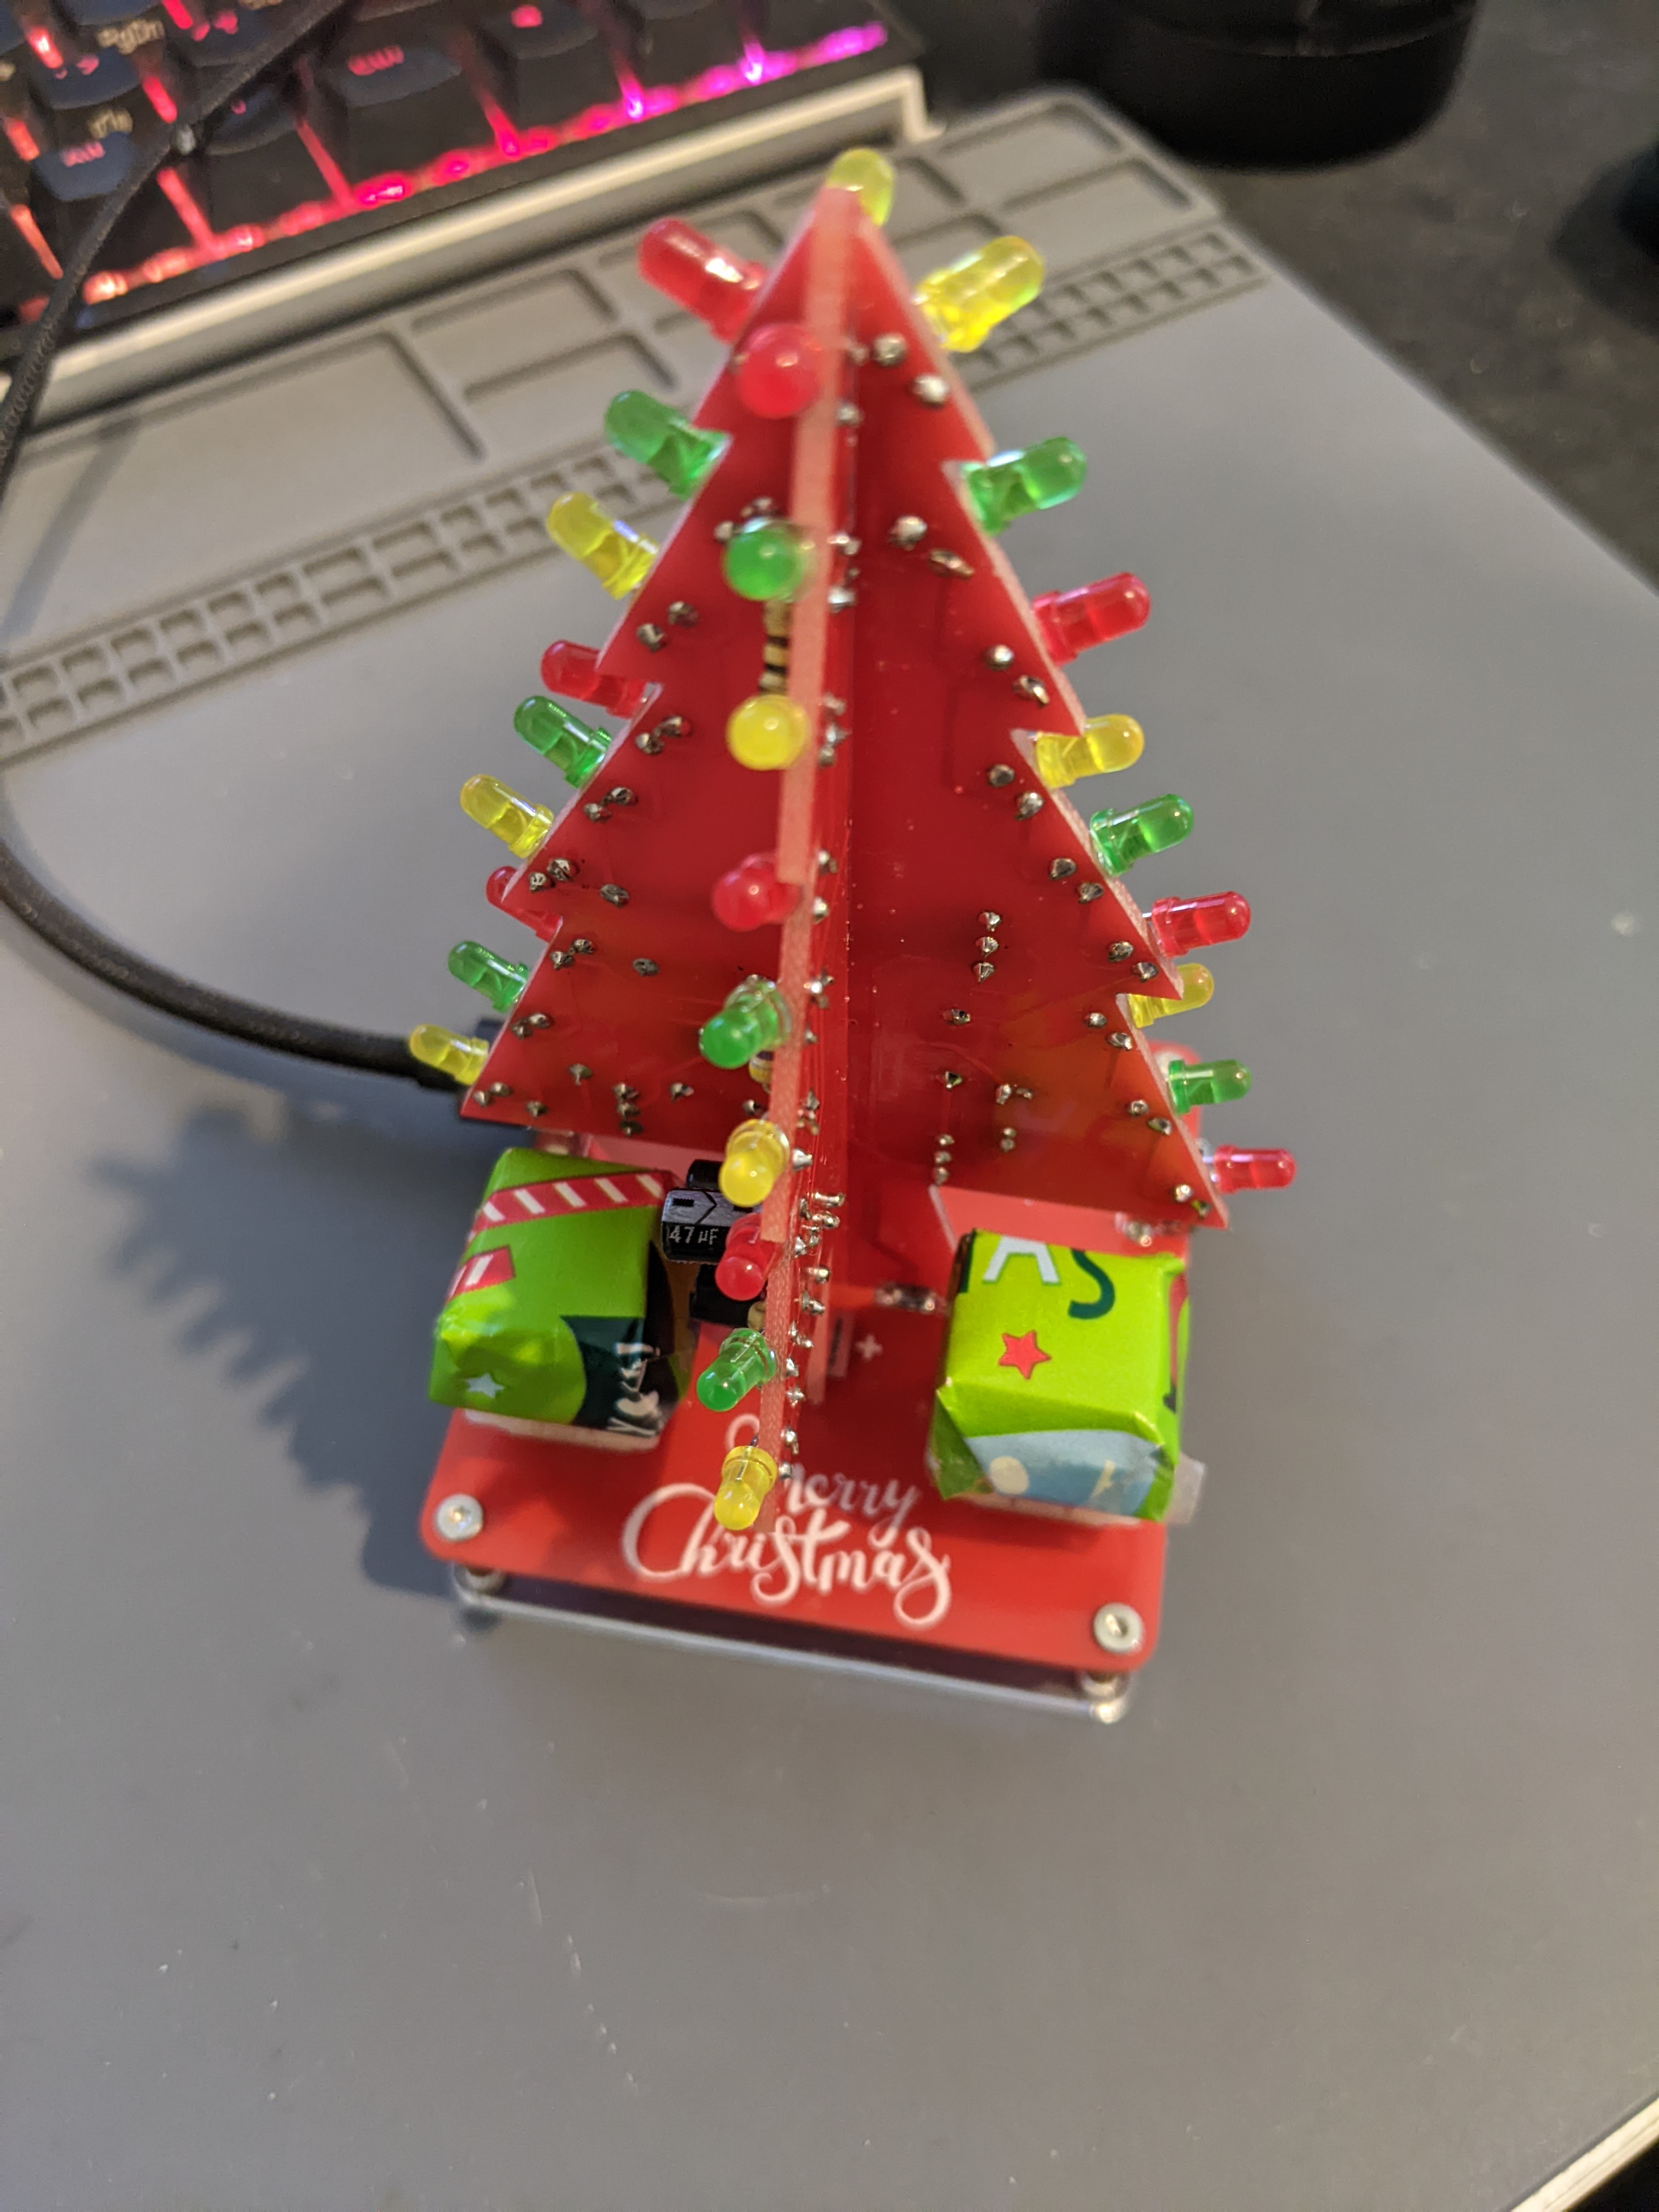
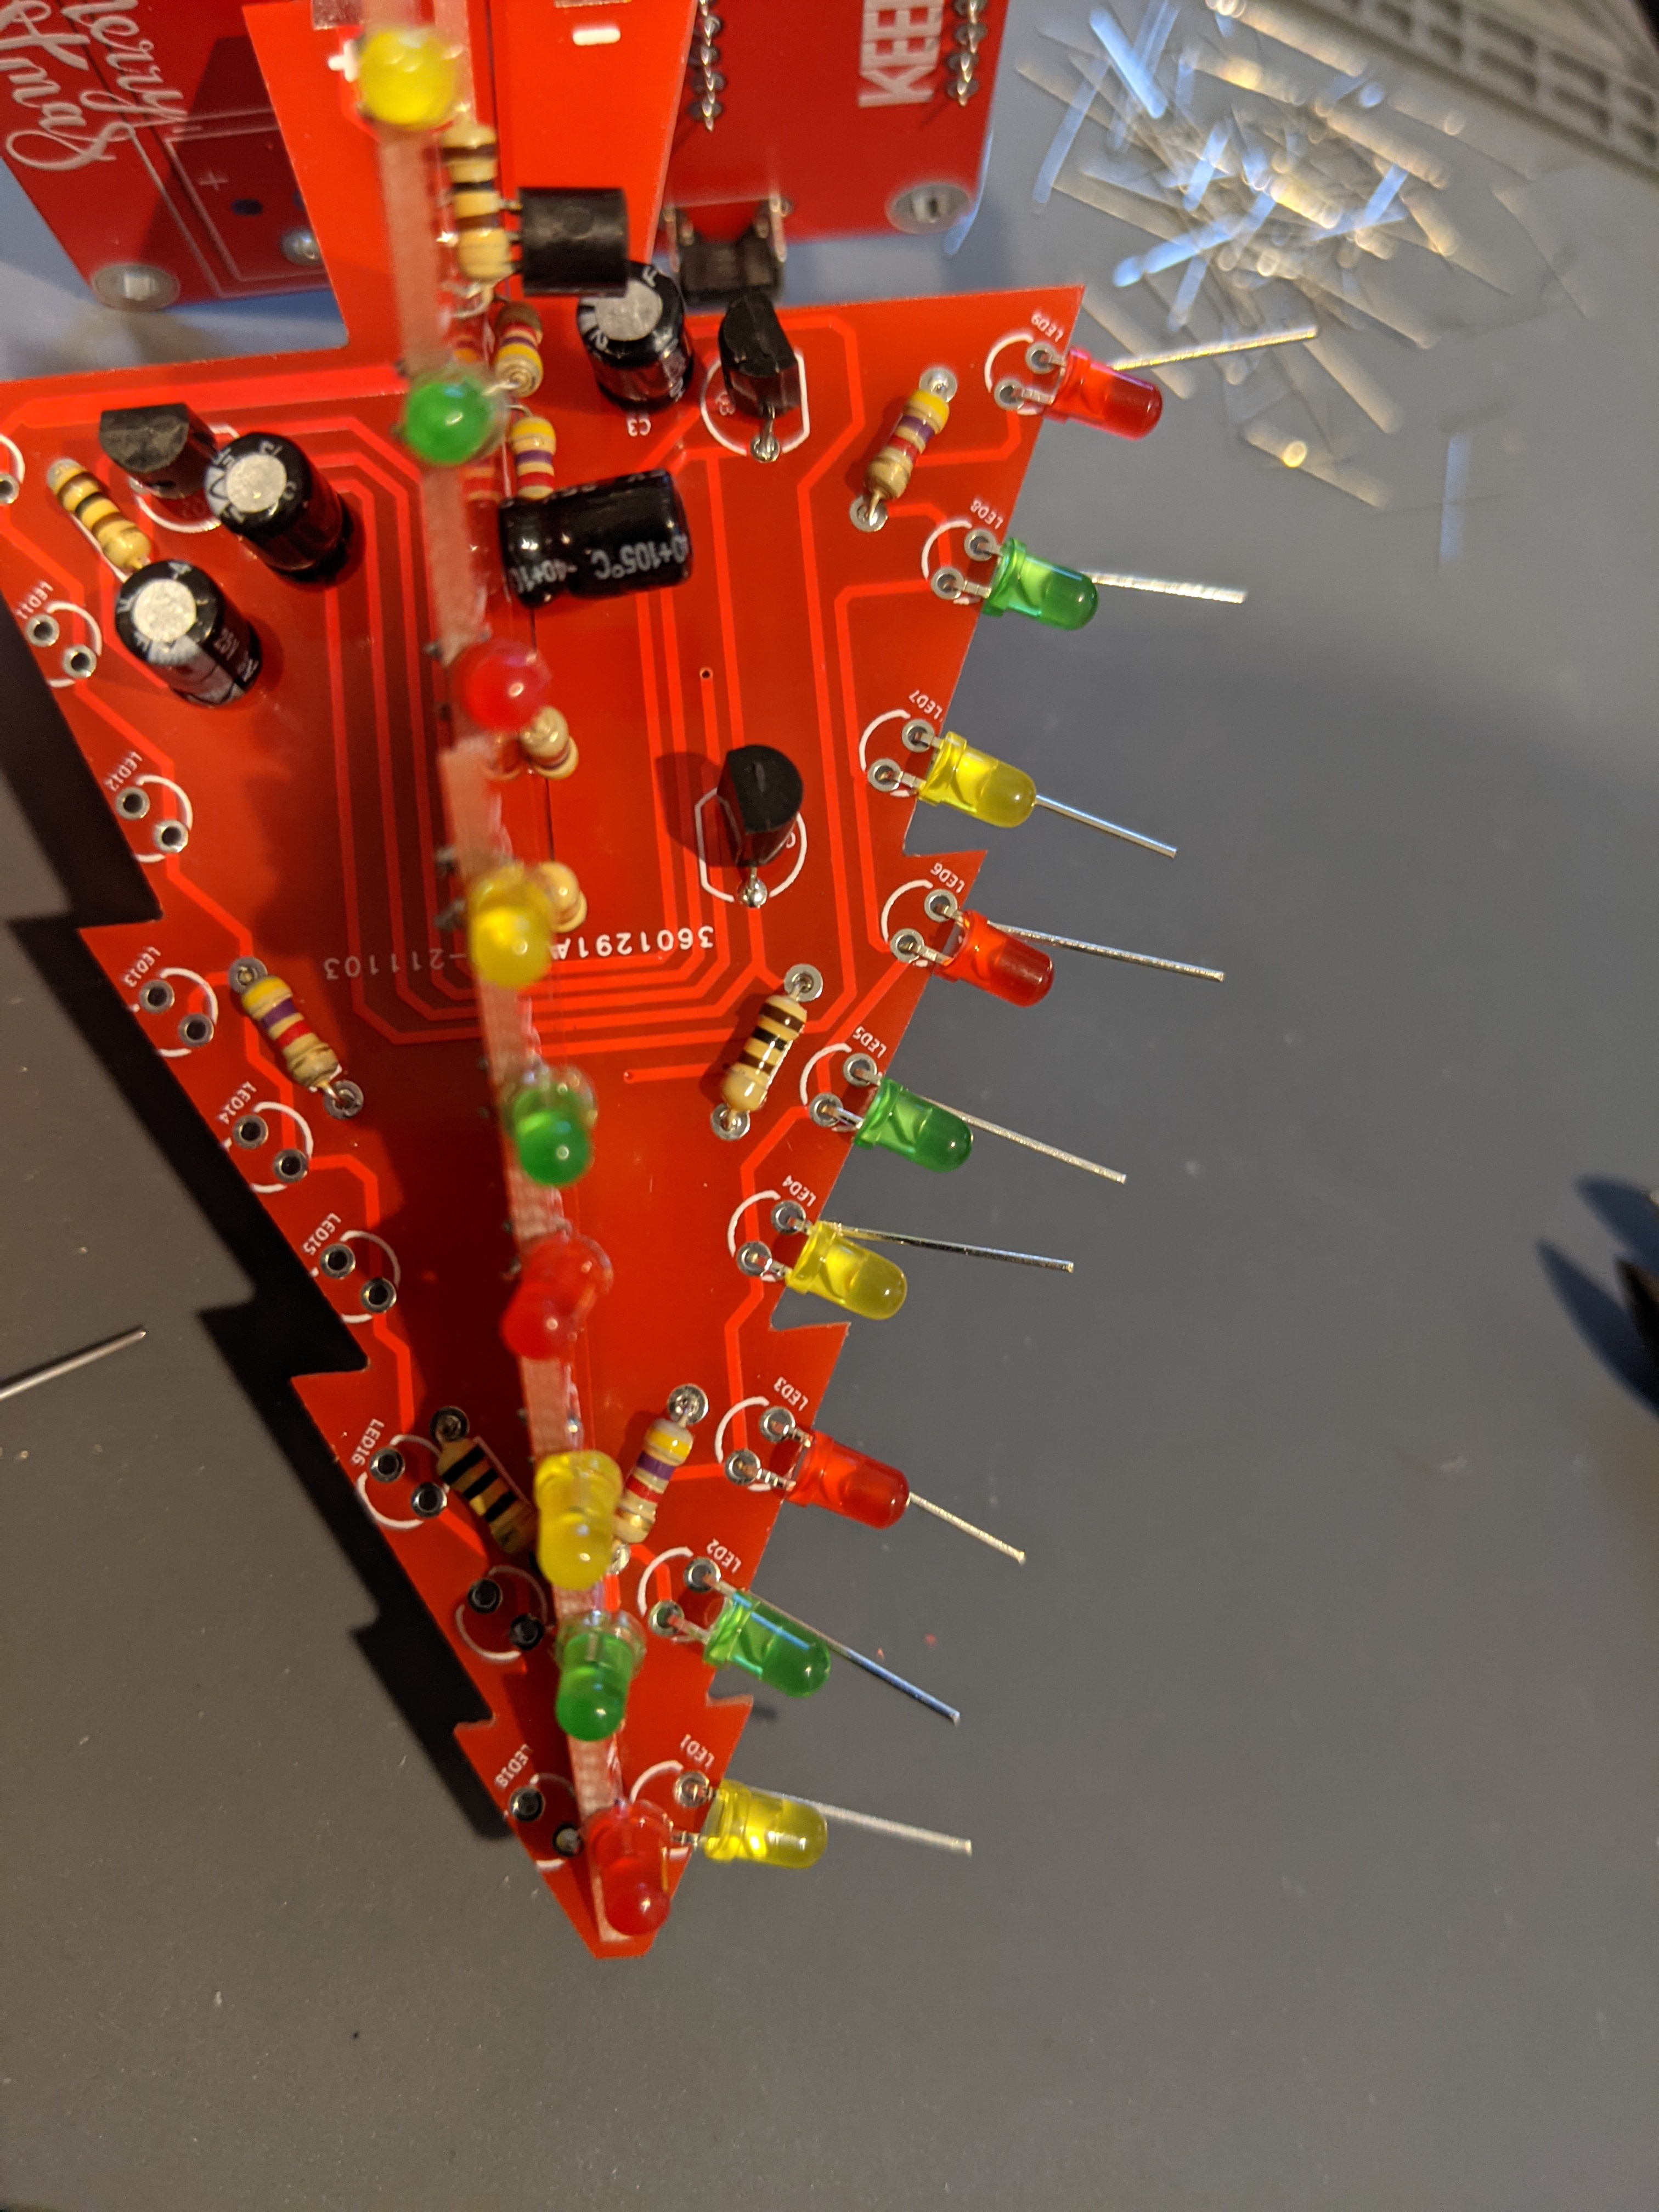
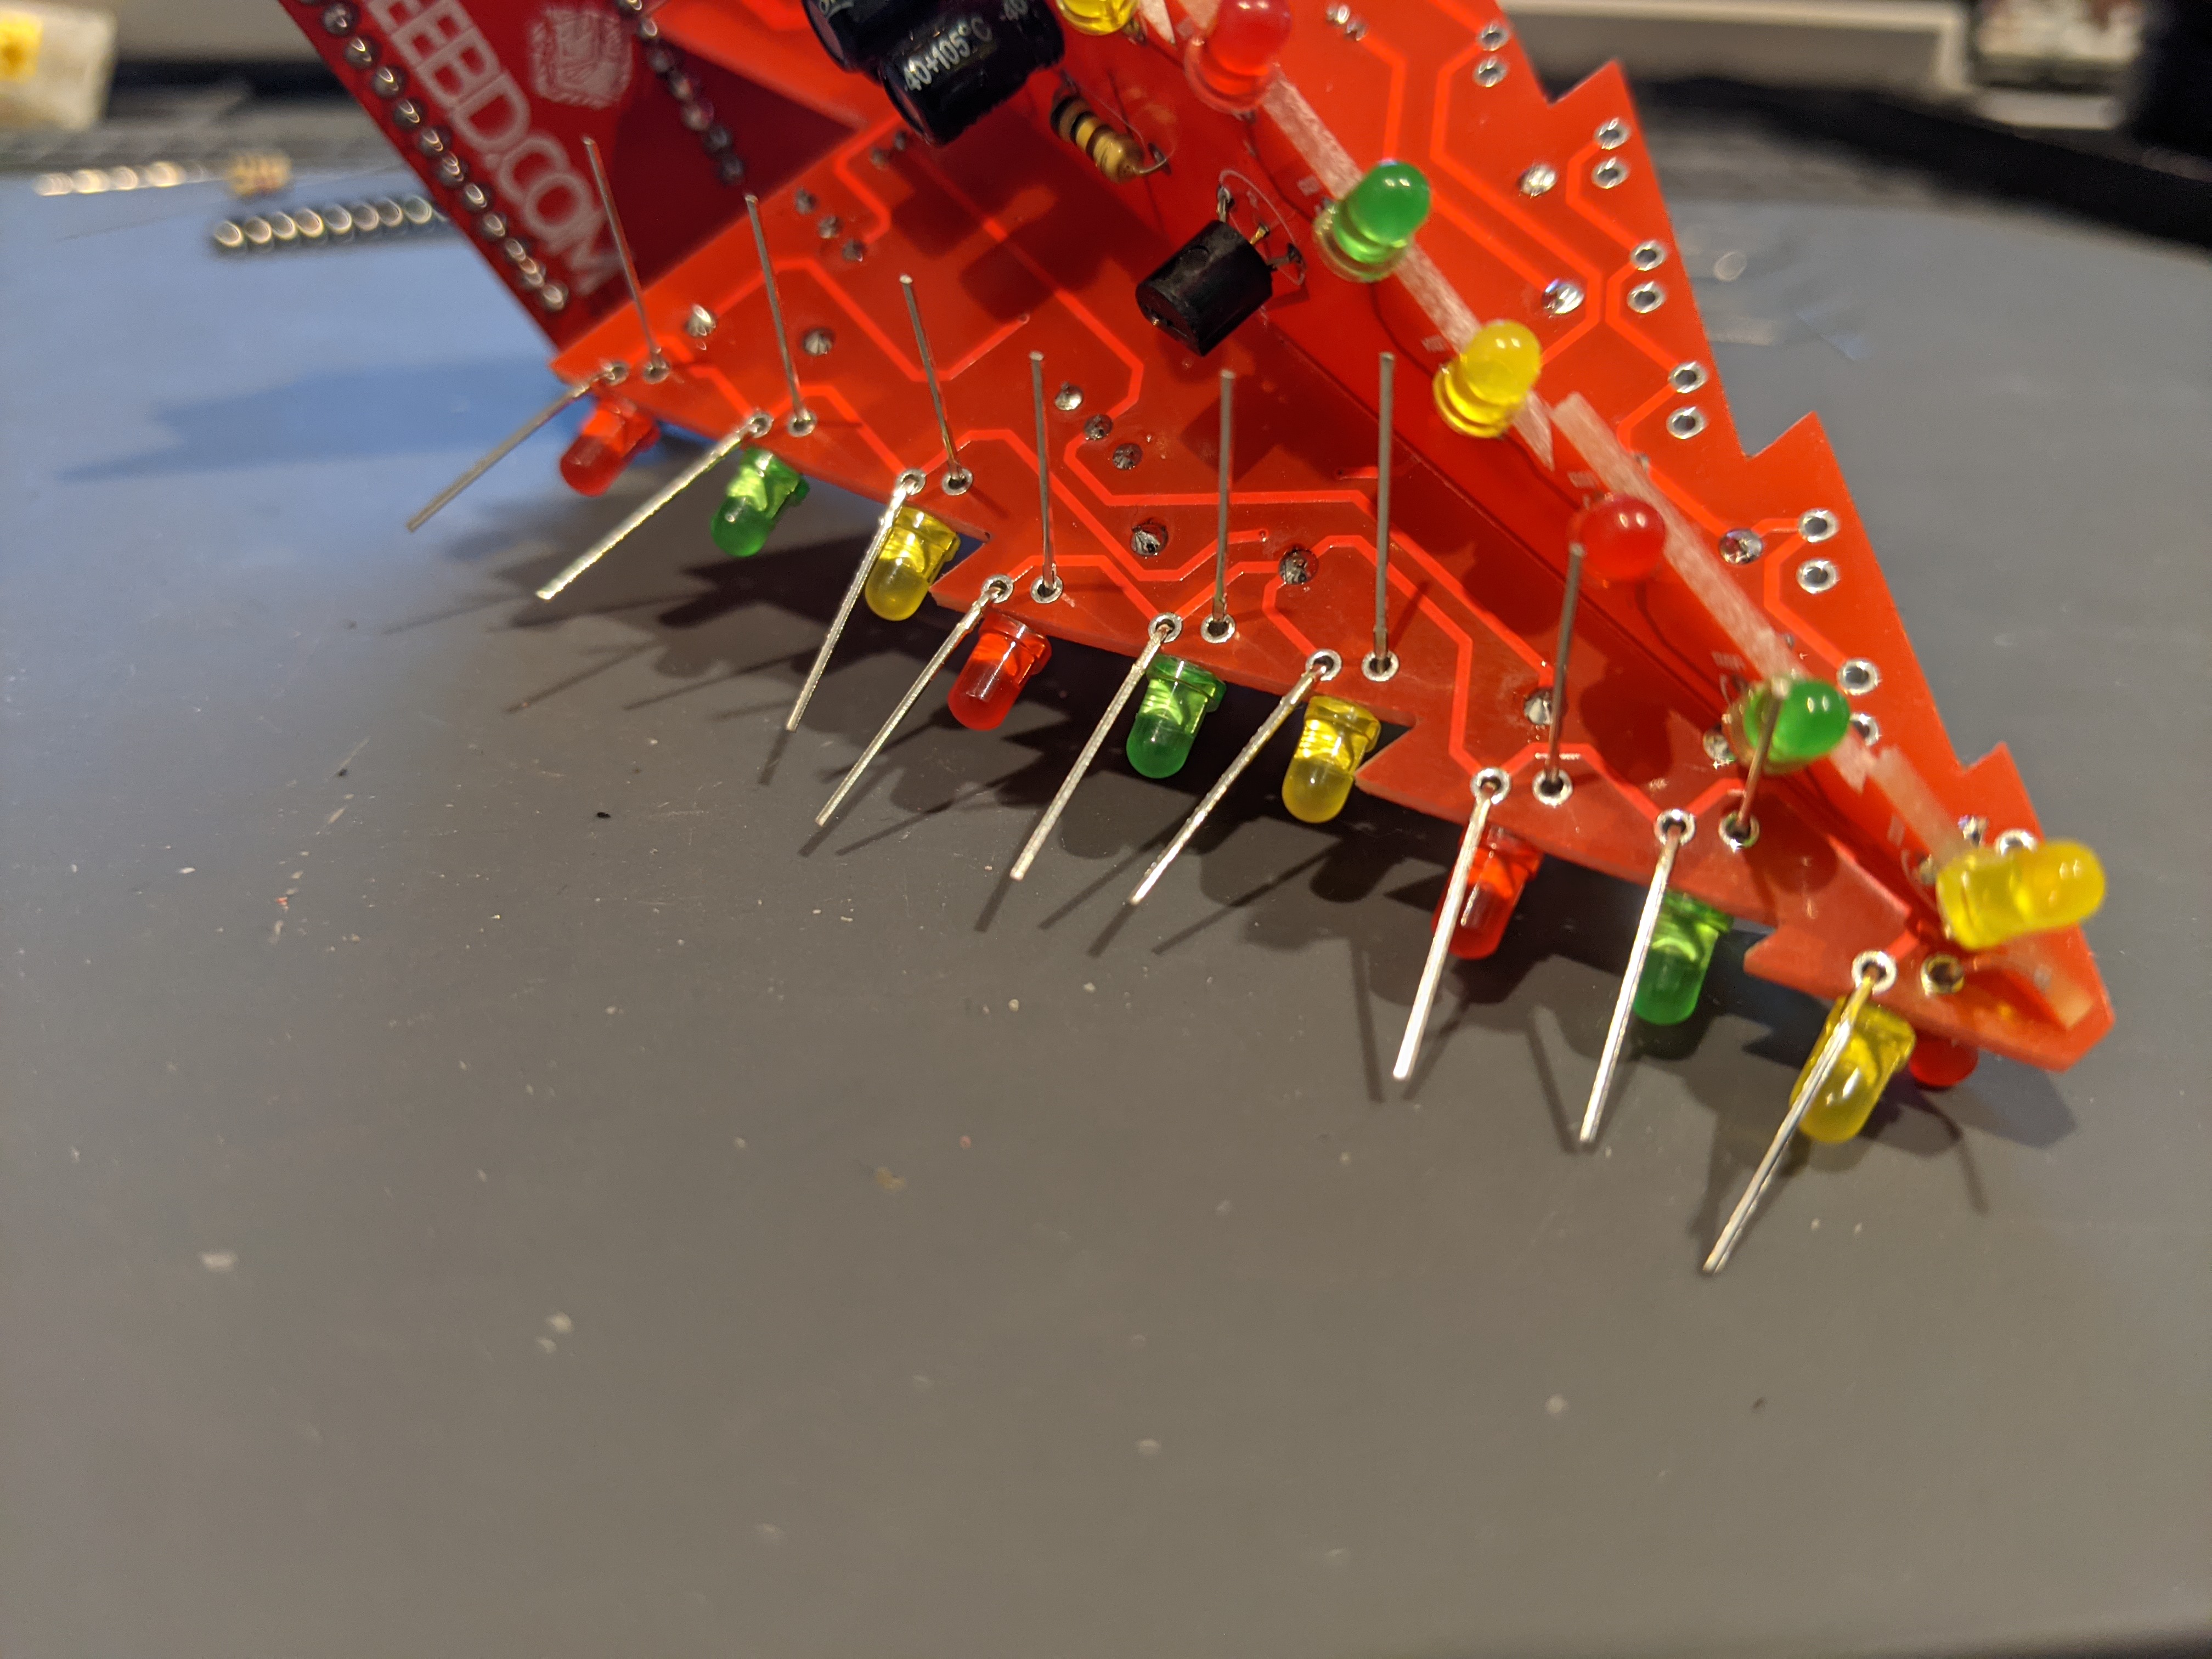
Solder LEDs
Now we need to slide the two Tree Trunk PCBs together. Start with the Tree Trunk PCB with the slot at the bottom and make sure the componenet side is facing you. Now slide the Tree Trunk PCB with the slot at the top up the first Tree Trunk PCB making sure the components are on the left.
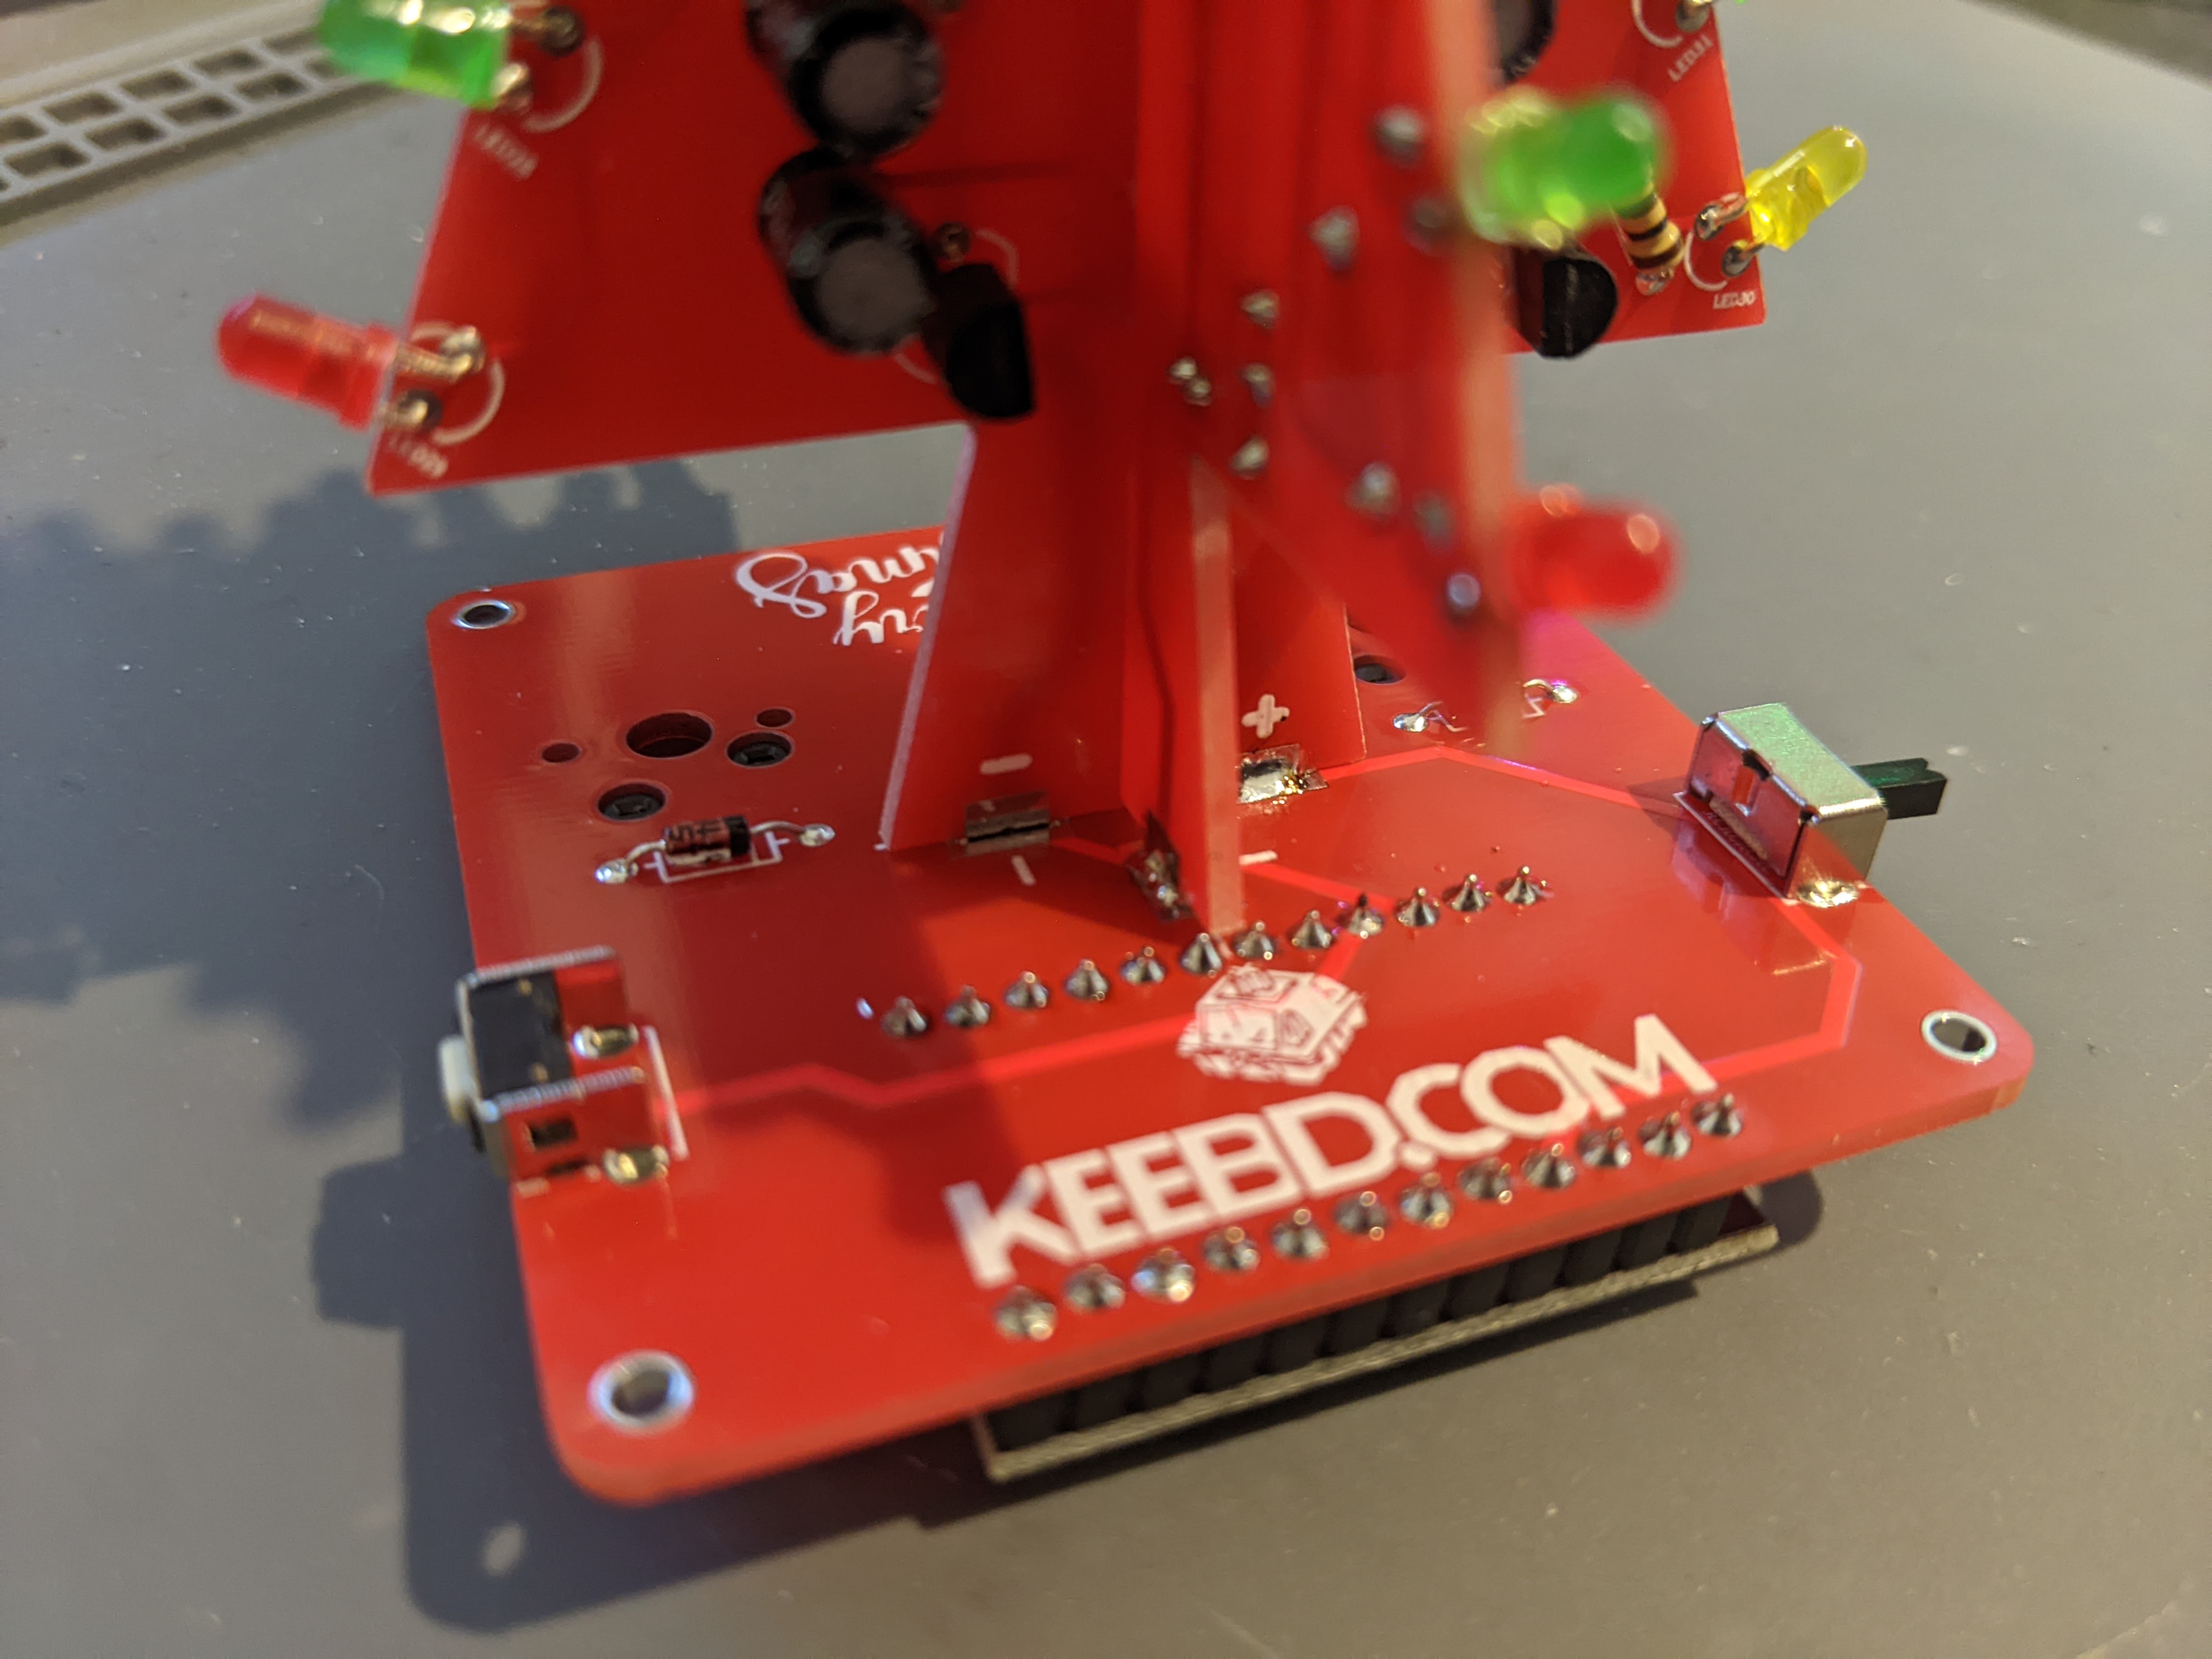
Now that the two Tree Trunk PCBs are together we can solder the LEDs in an alternating pattern (Red, Green, Yellow)
The flat side or the short leg of the LED must be soldered into the flat/bottom side of the LED holes when looking at the tree trunks standing up
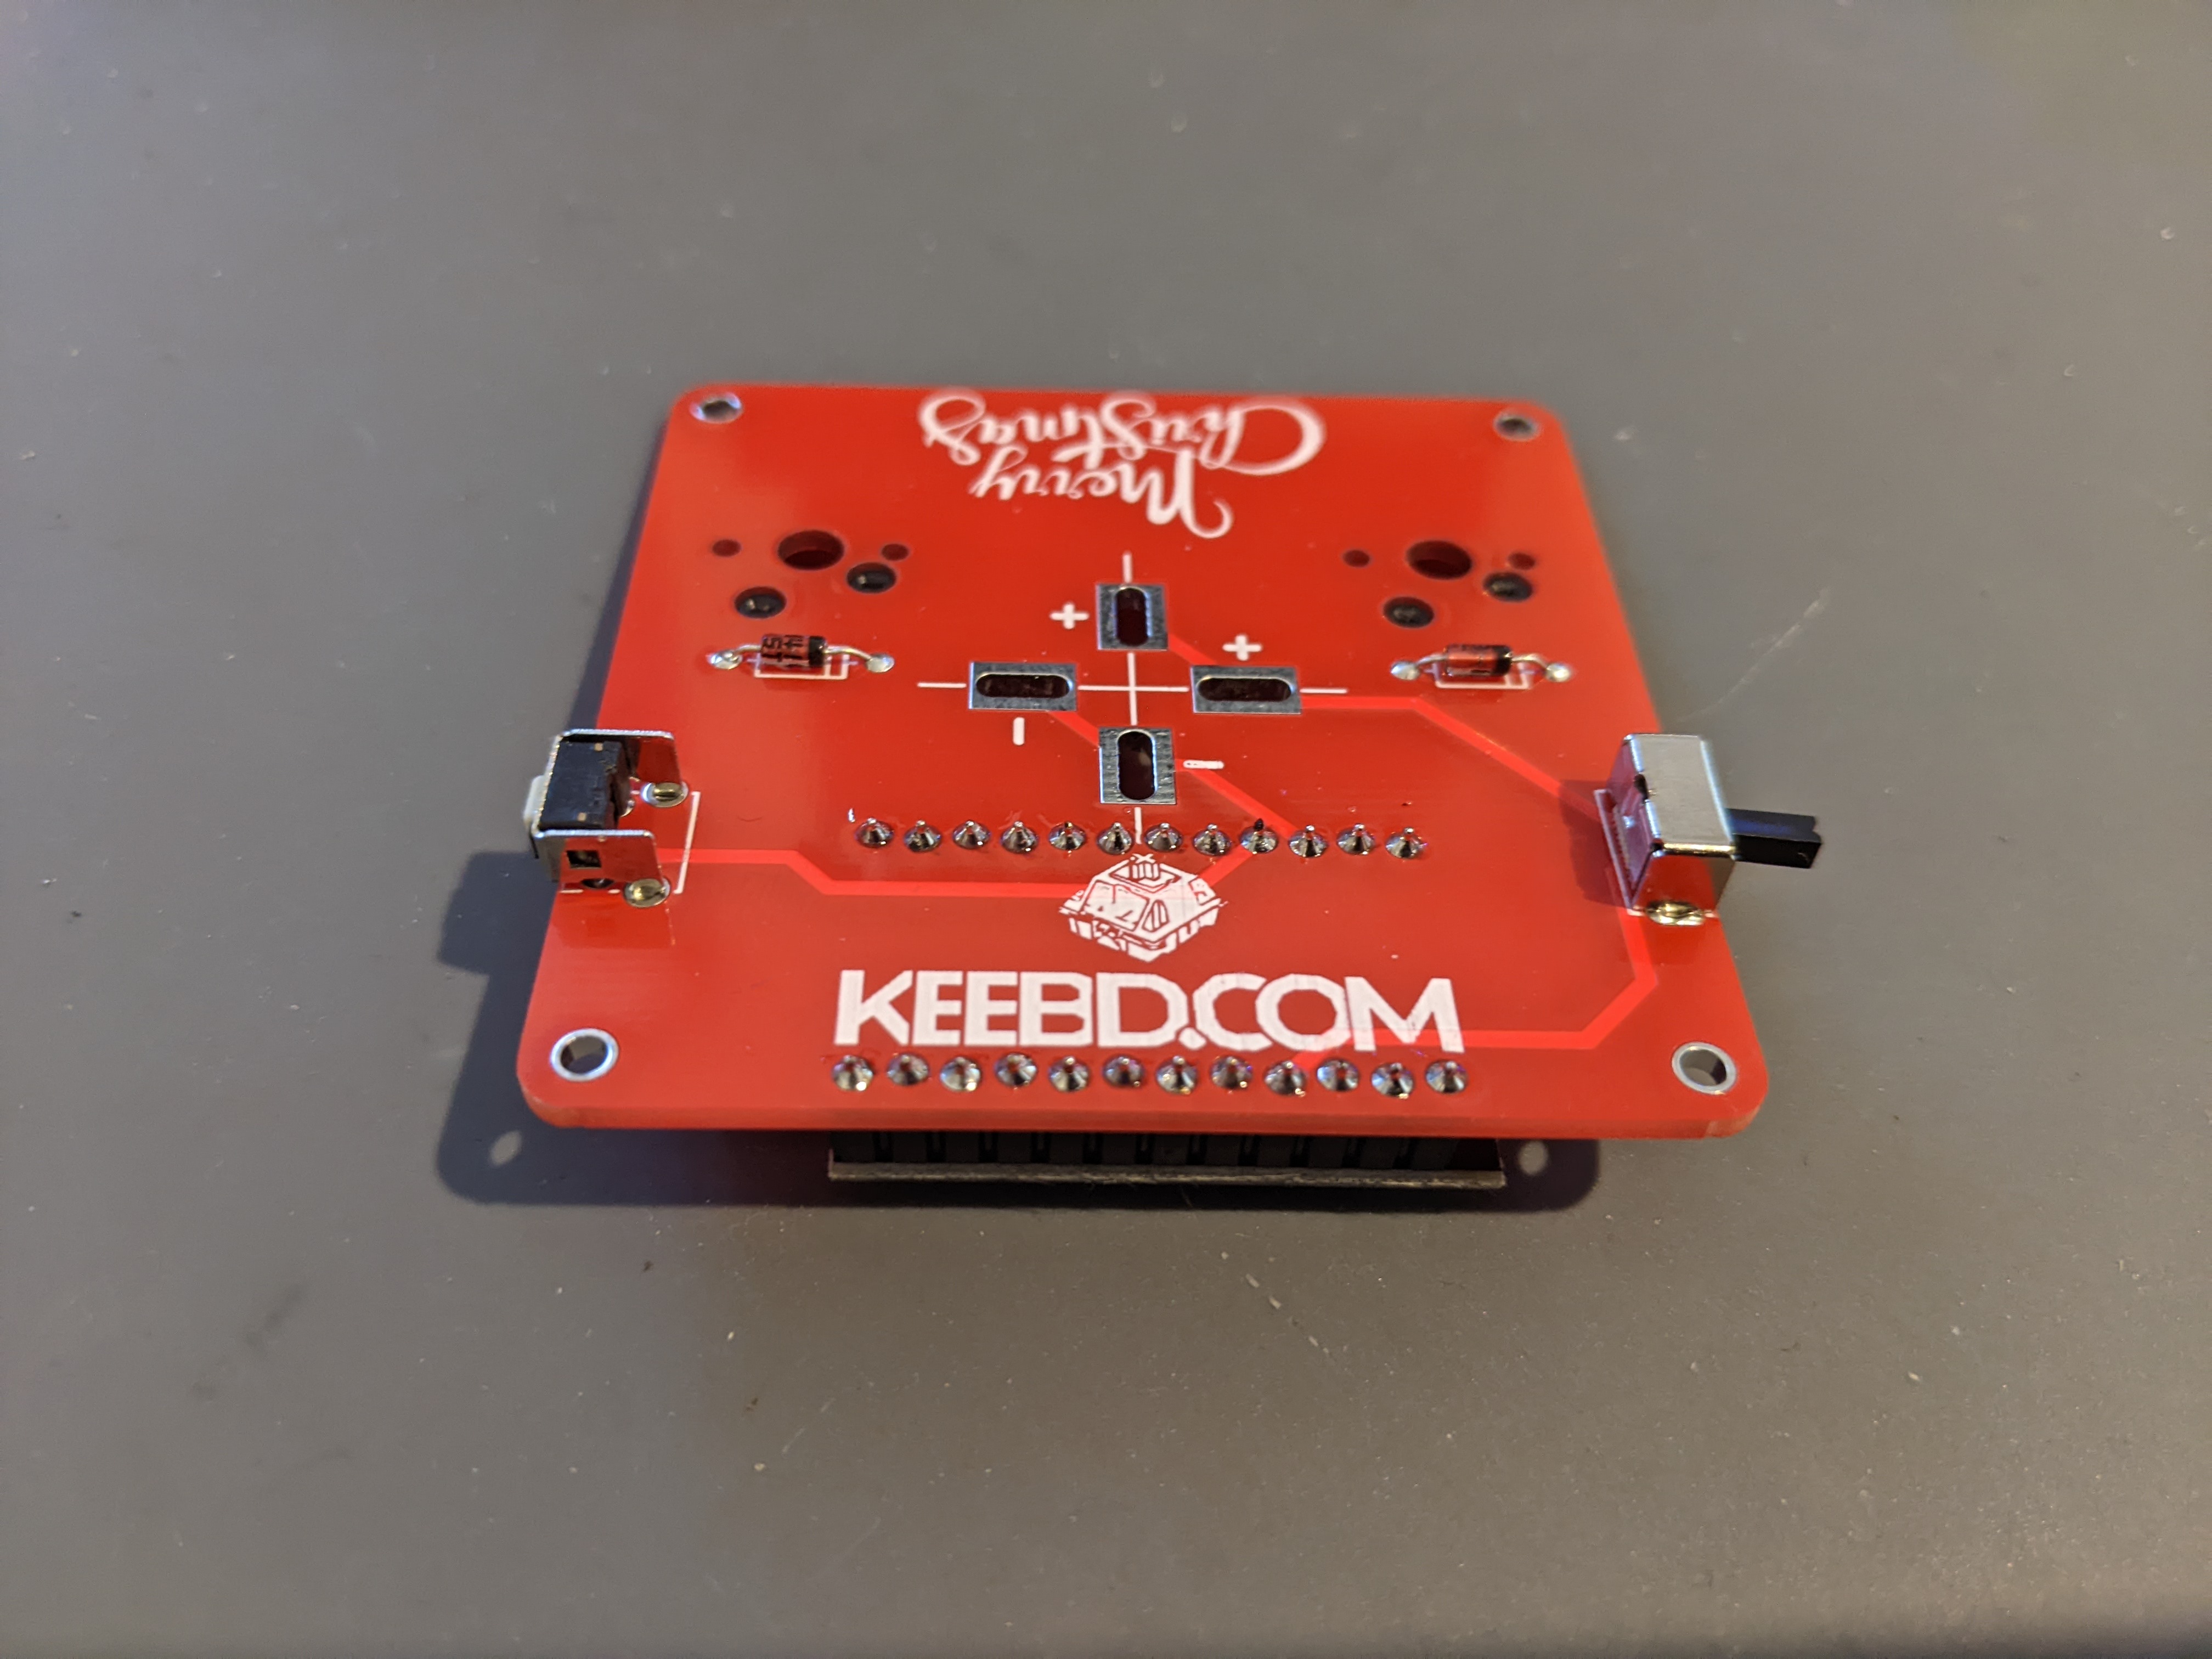
Solder Base Button
Now moving on to the Tree Base PCB we will start by soldering the controller reset button to the top side of the Tree Base PCB (the side with the artwork)
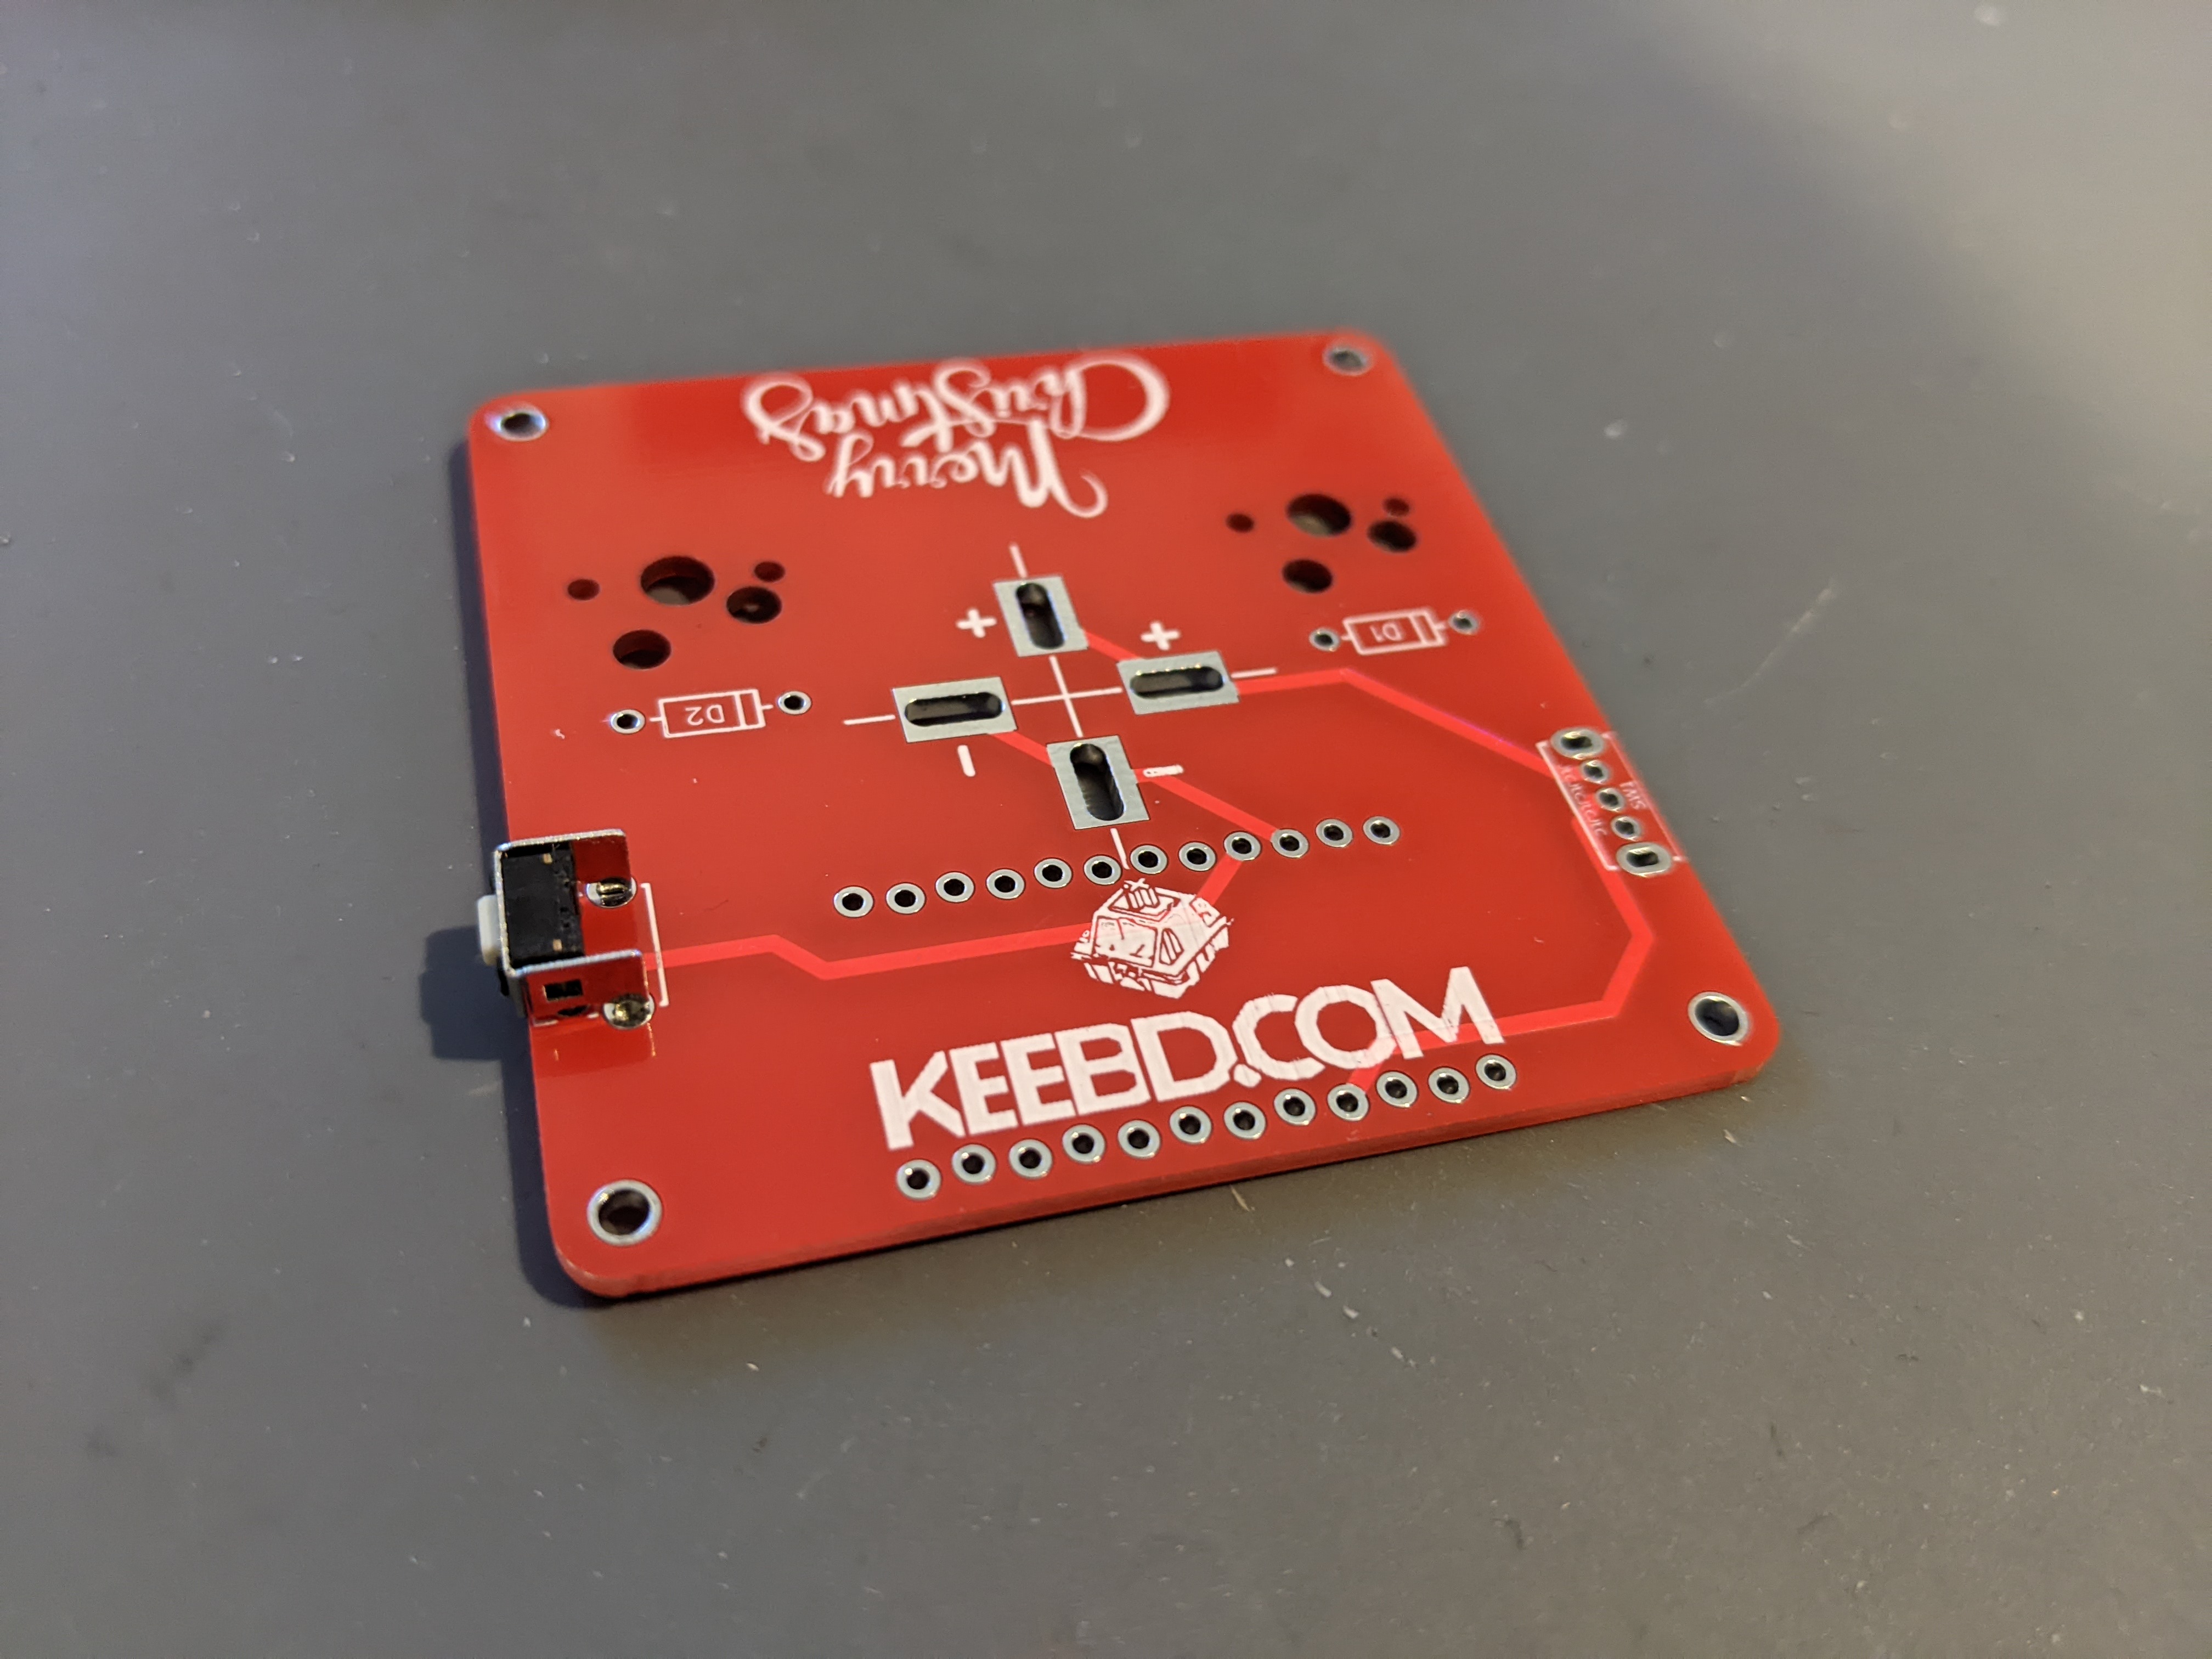
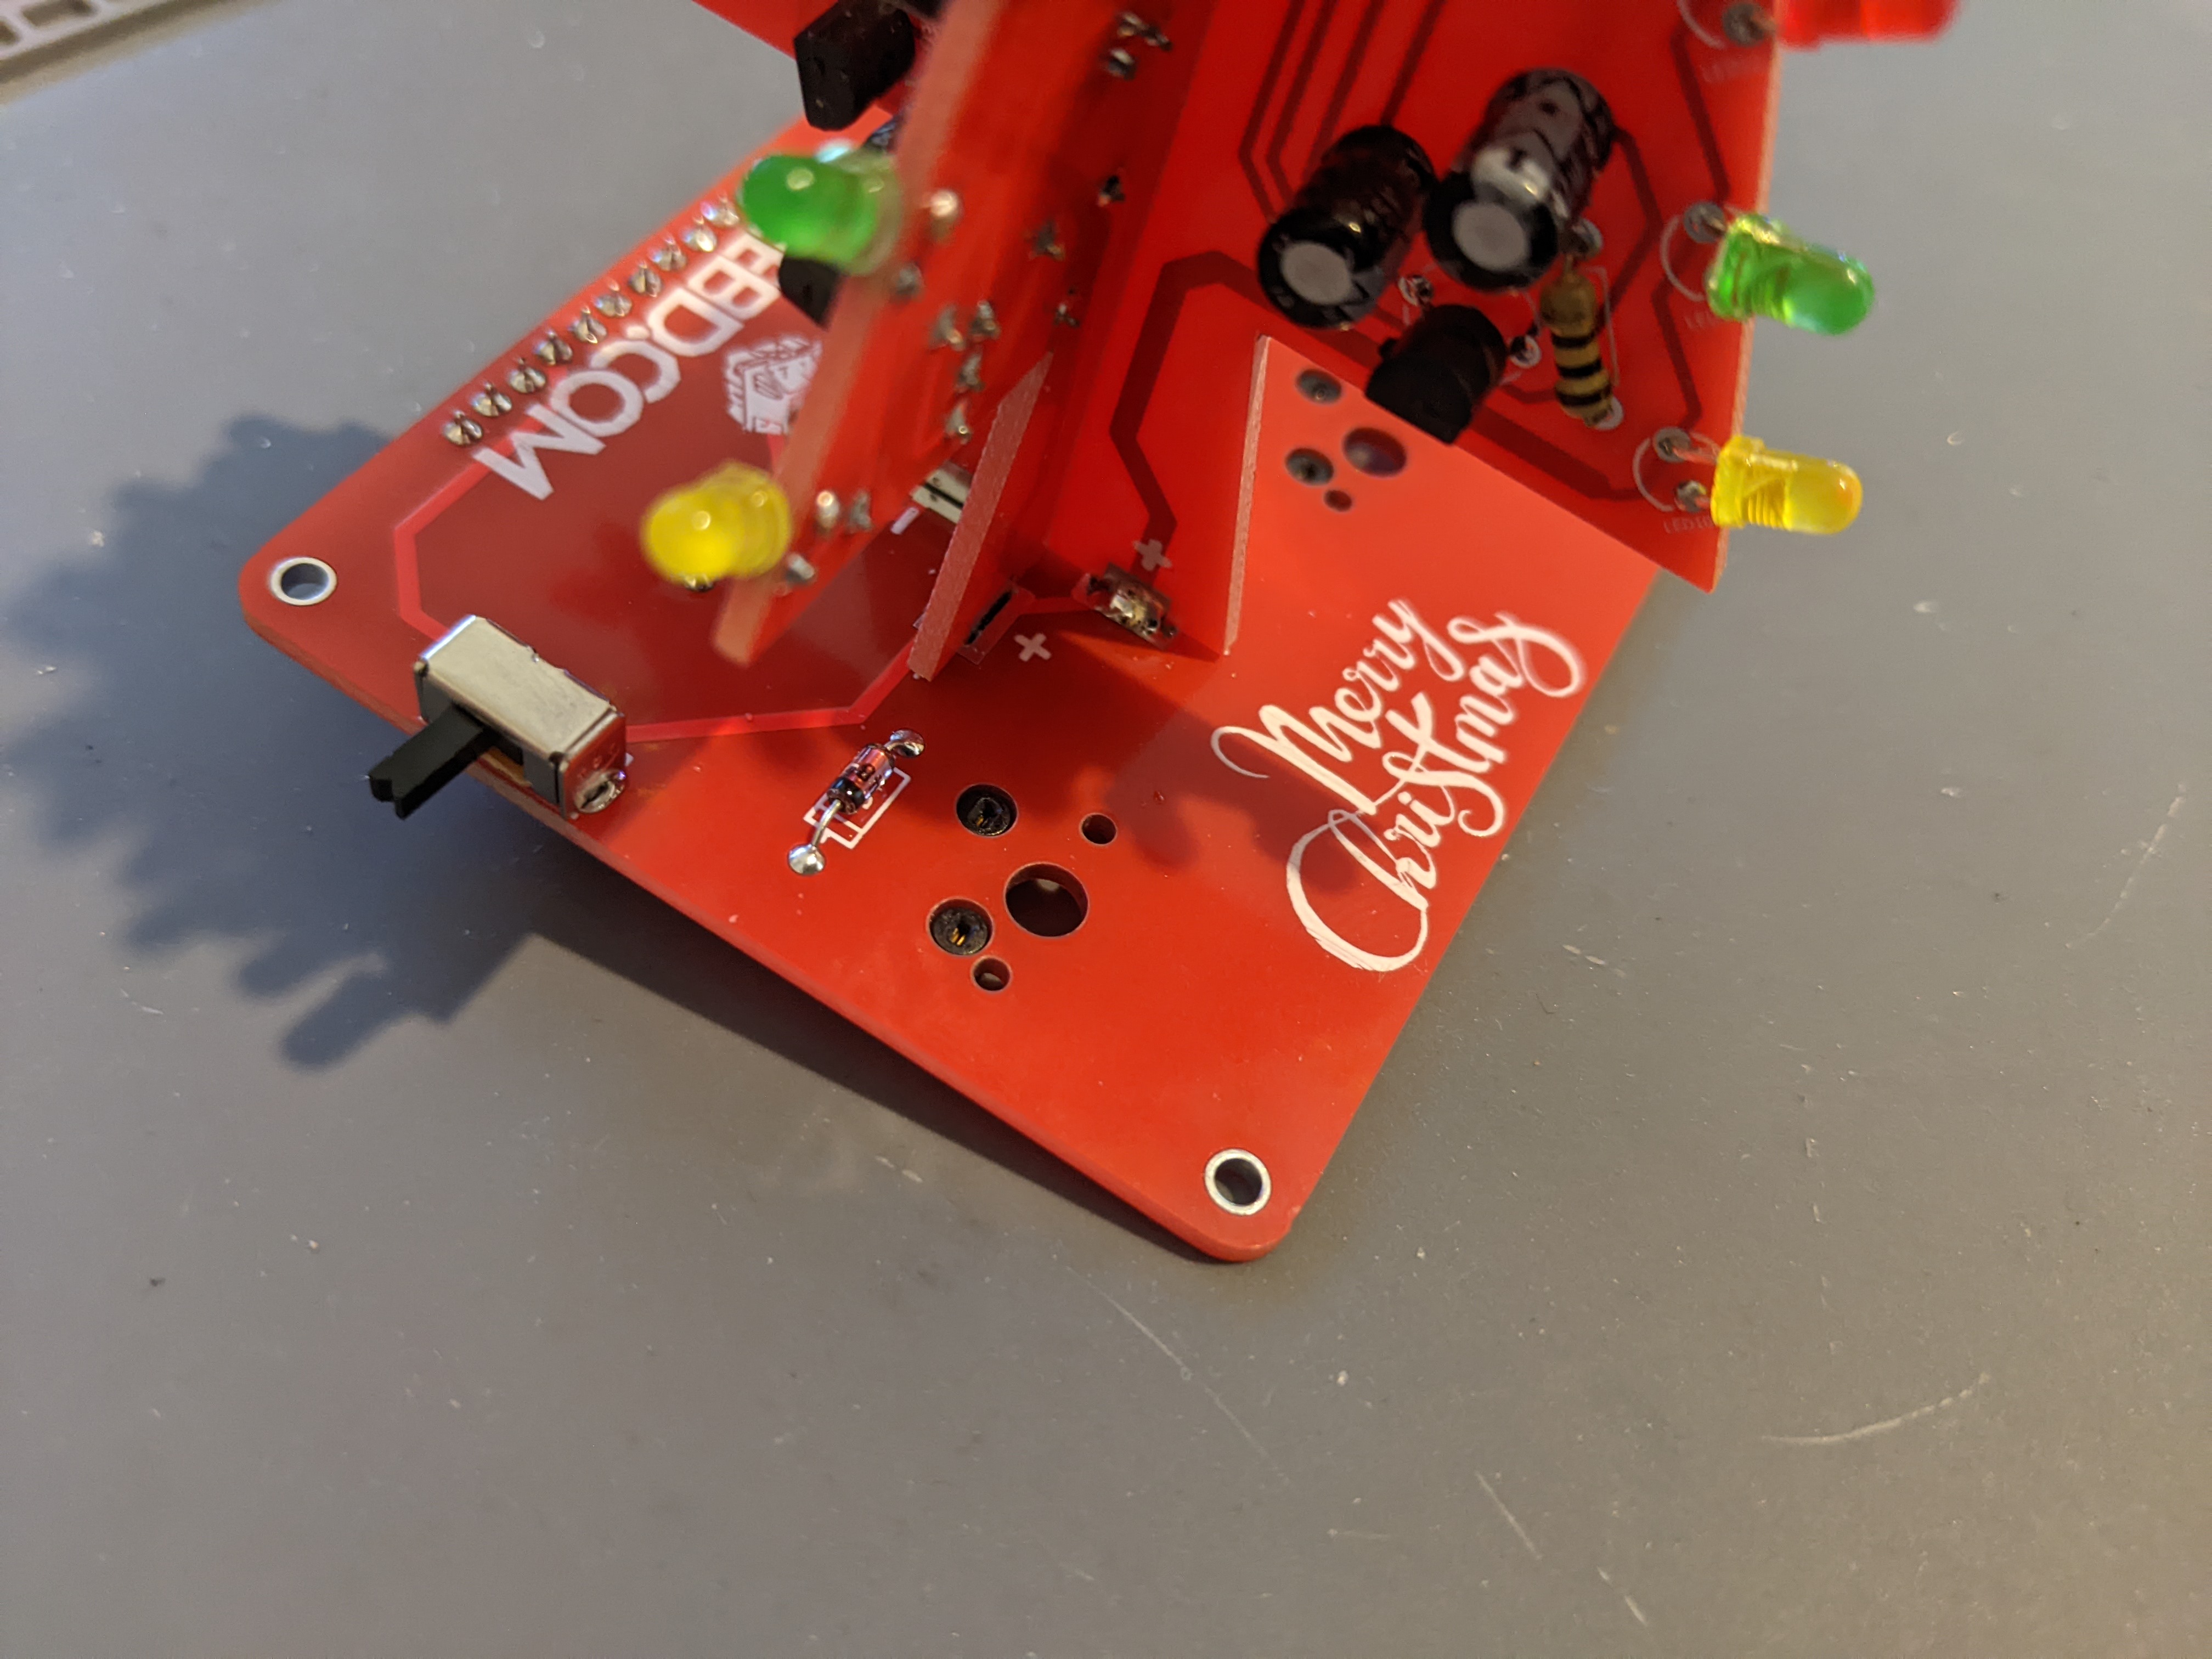
Solder Base Switch
Now soldering the power position switch to the top side of the Tree Base PCB. This switch will control if the tree LED lights are on or off without needing to unplug the tree

Solder Base Diodes
Solder the diodes to the top of the Tree Base PCB
please note the black line on the diode must line up with the line on the PCB diode outline


Solder Base Sockets
Solder the Kailh Hot Swap switch sockets to the bottom/underside of the Tree Base PCB
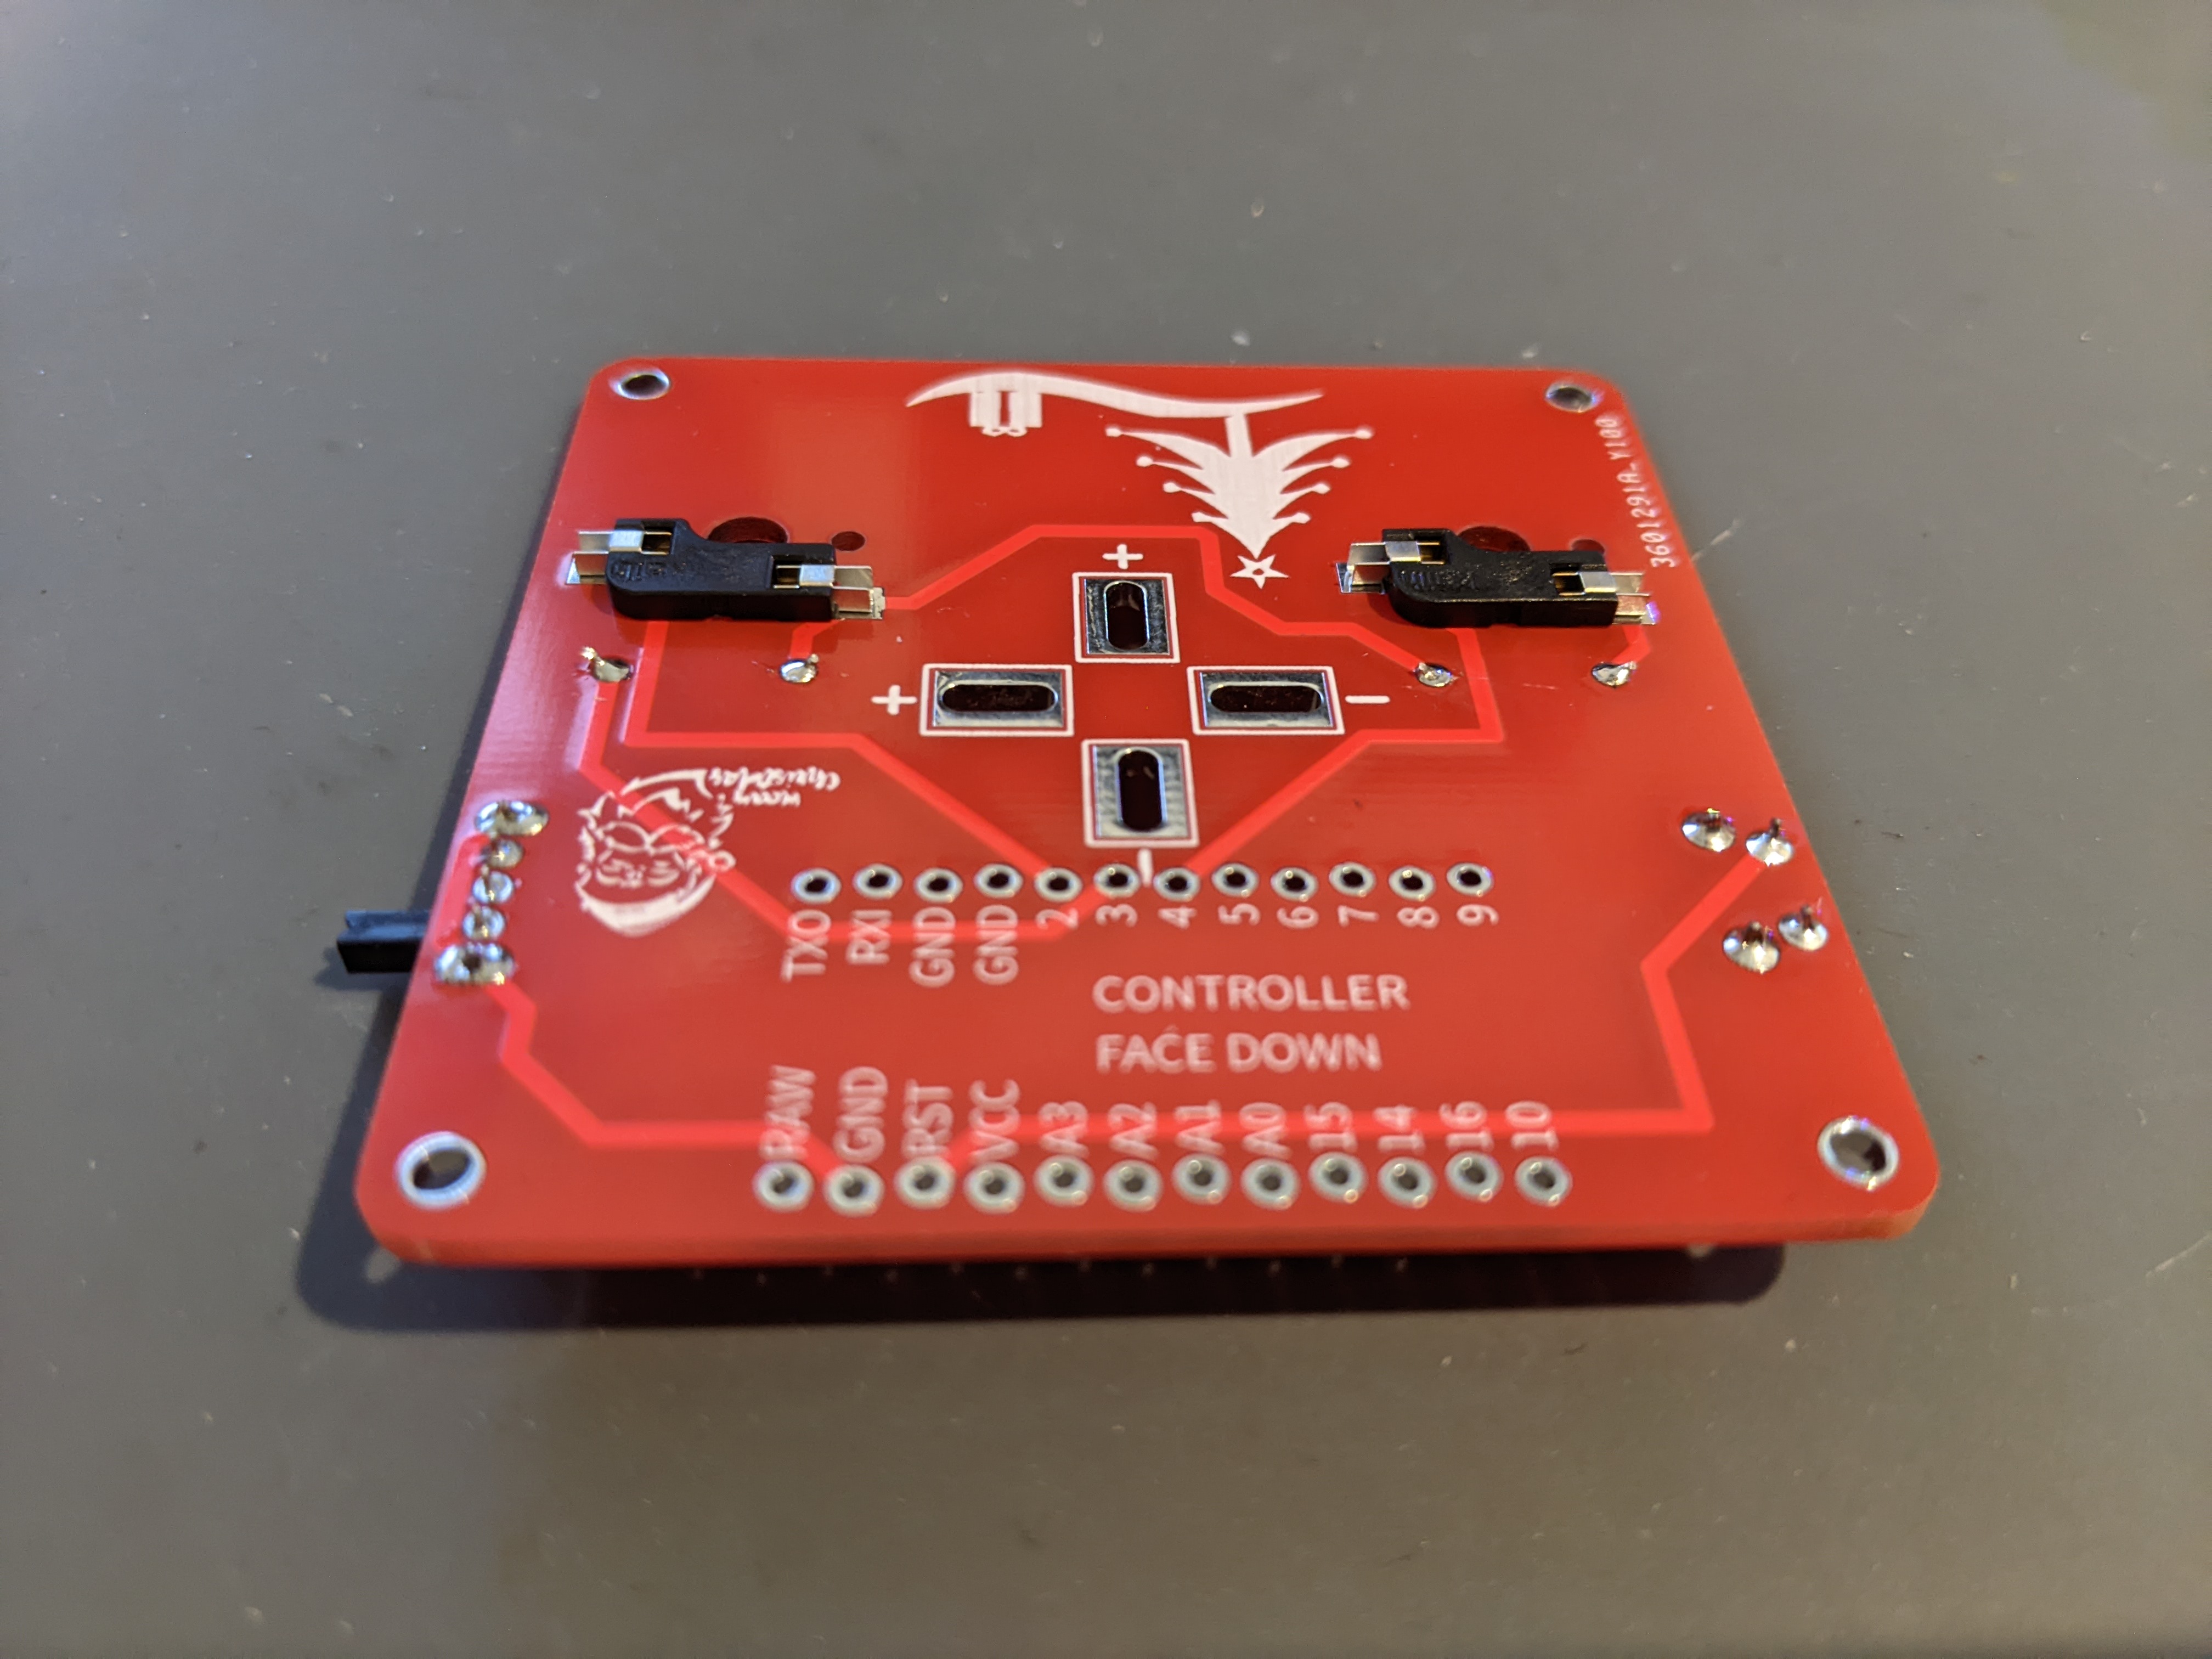

Solder Base Controller
If you wish to socket your controller for easy replacement/upgrade later then we recommend soldering in machined female socket headers as per the pictures bellow on the bottom/underside of the Tree Base PCB
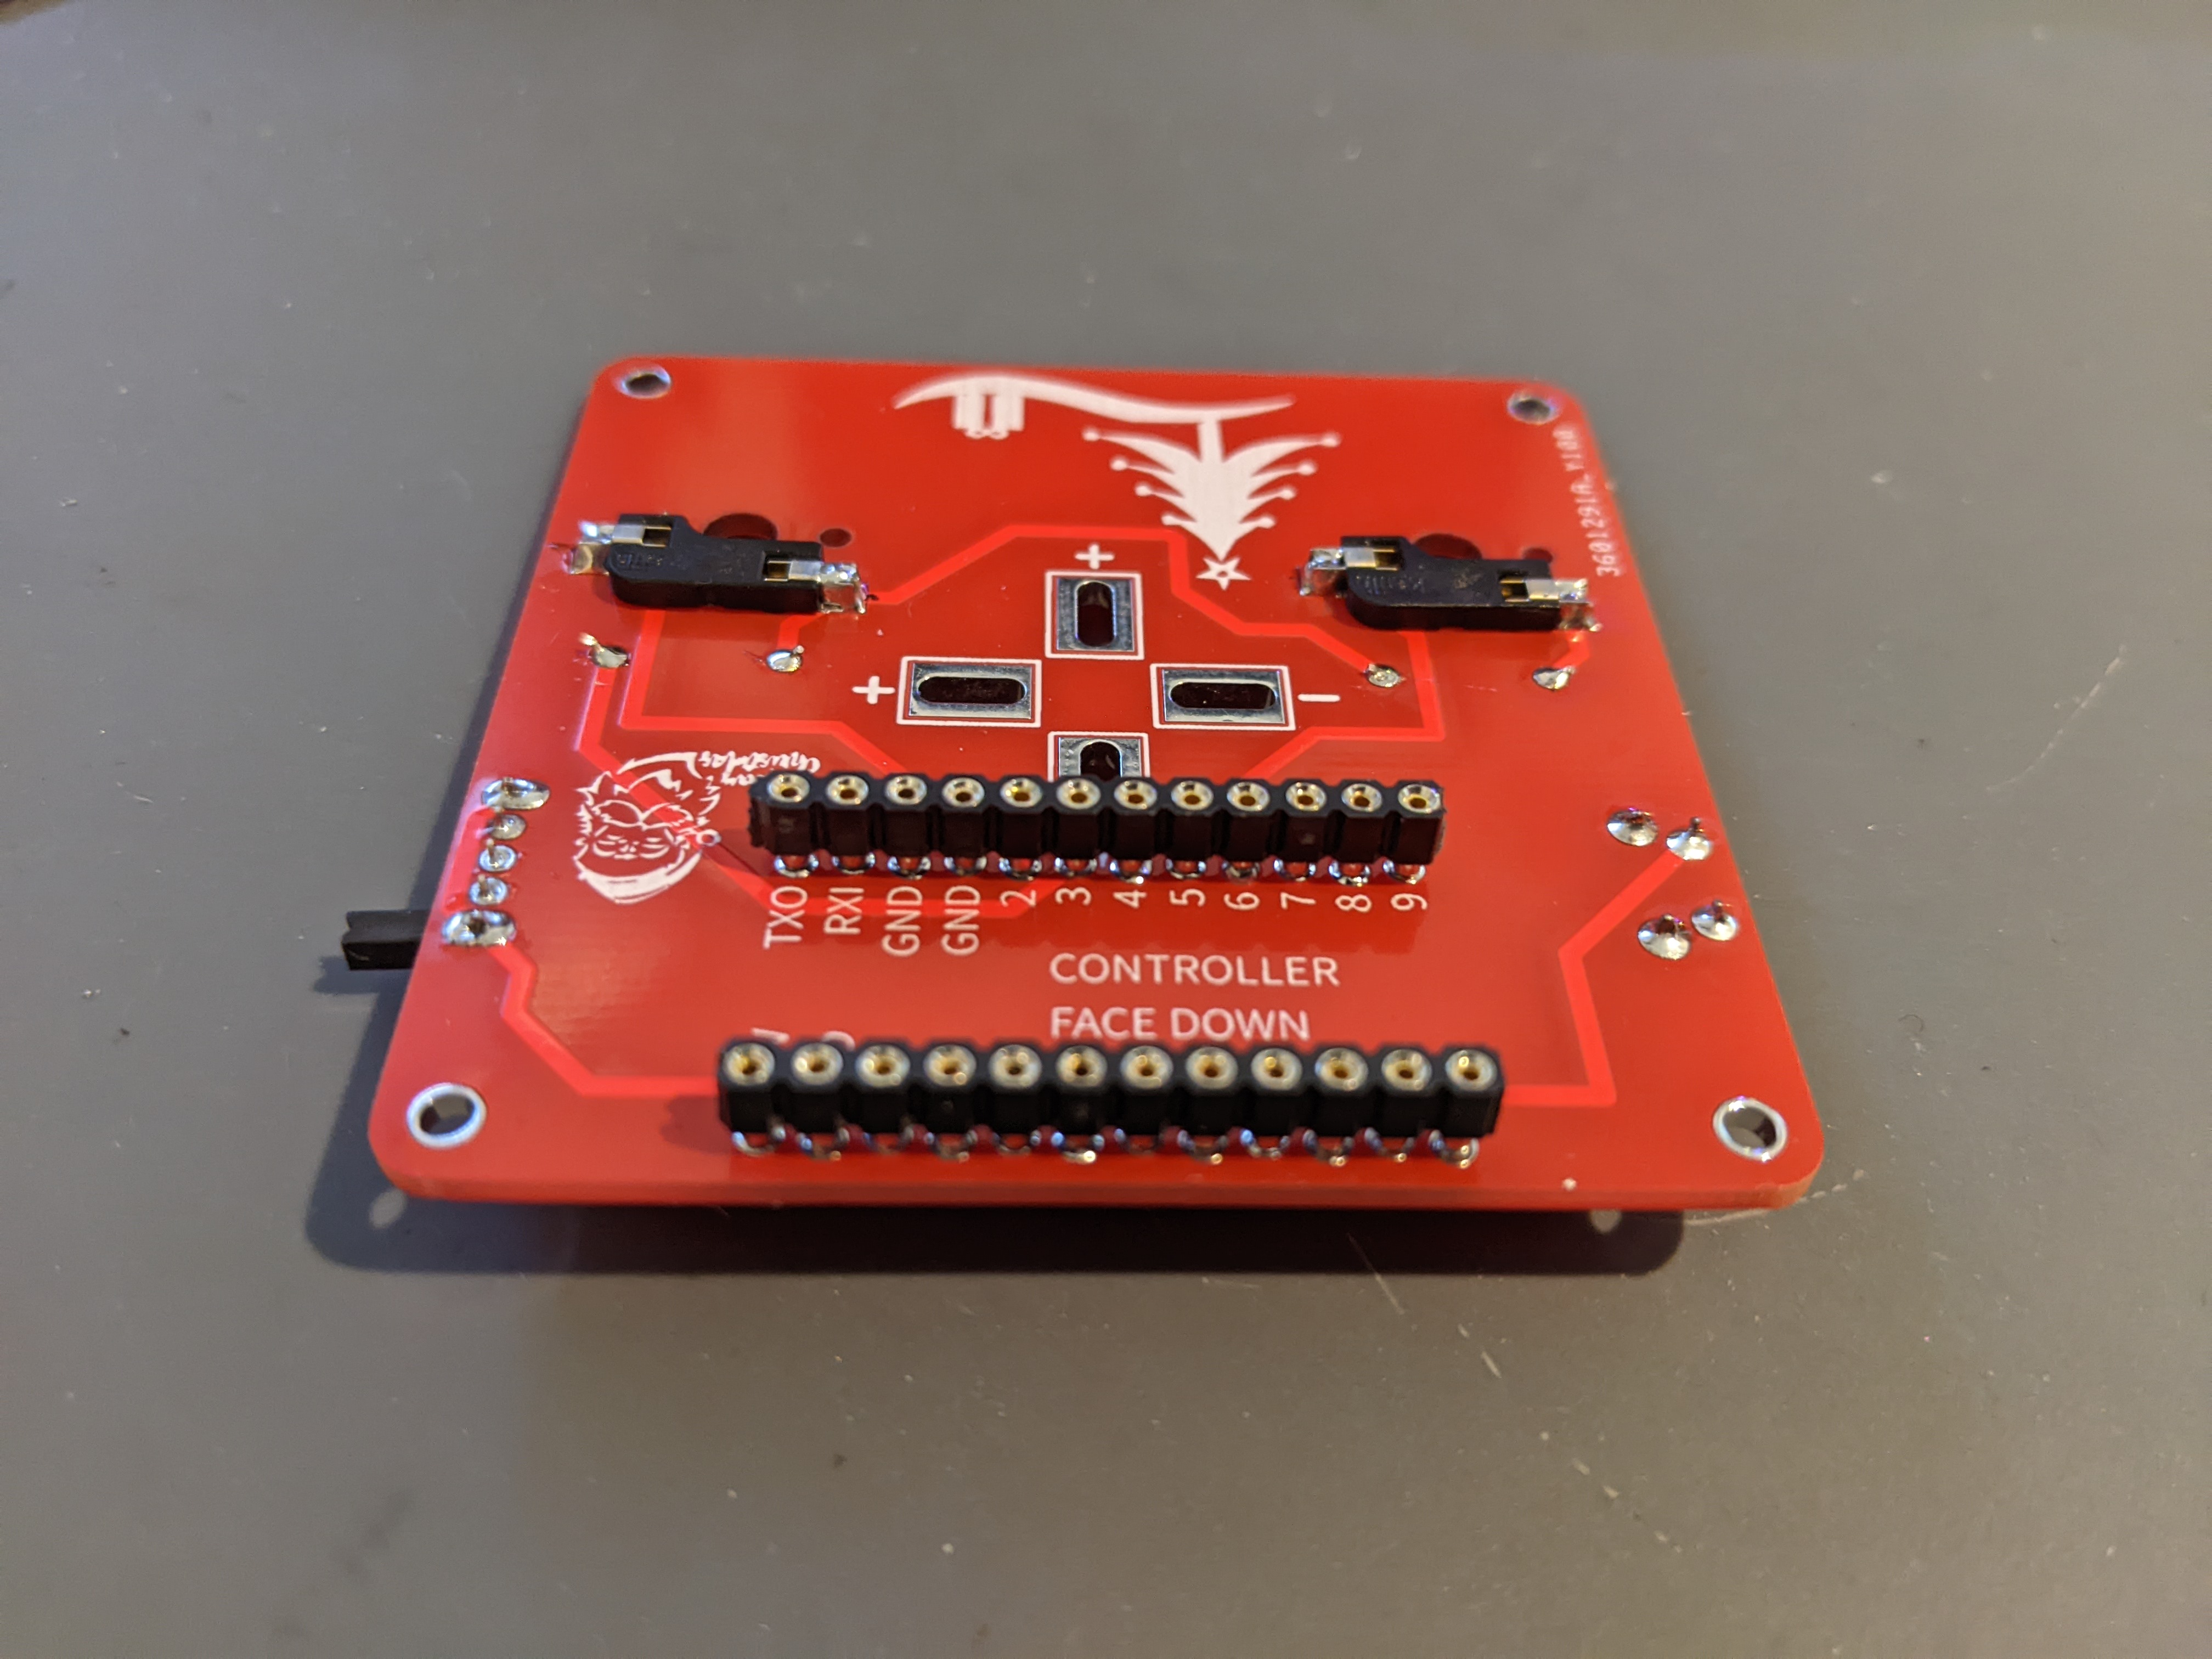
Then proceed to socket the controller using Mill-Max pins or Machine Male headers.
Alternativley you can solder the controller directly to the underside of the Tree Base PCB using the supplied header pins that came with the controller.
Assemble Acrylic Bottom Plate Case
Complete with screws, standoffs, and bottom plate.
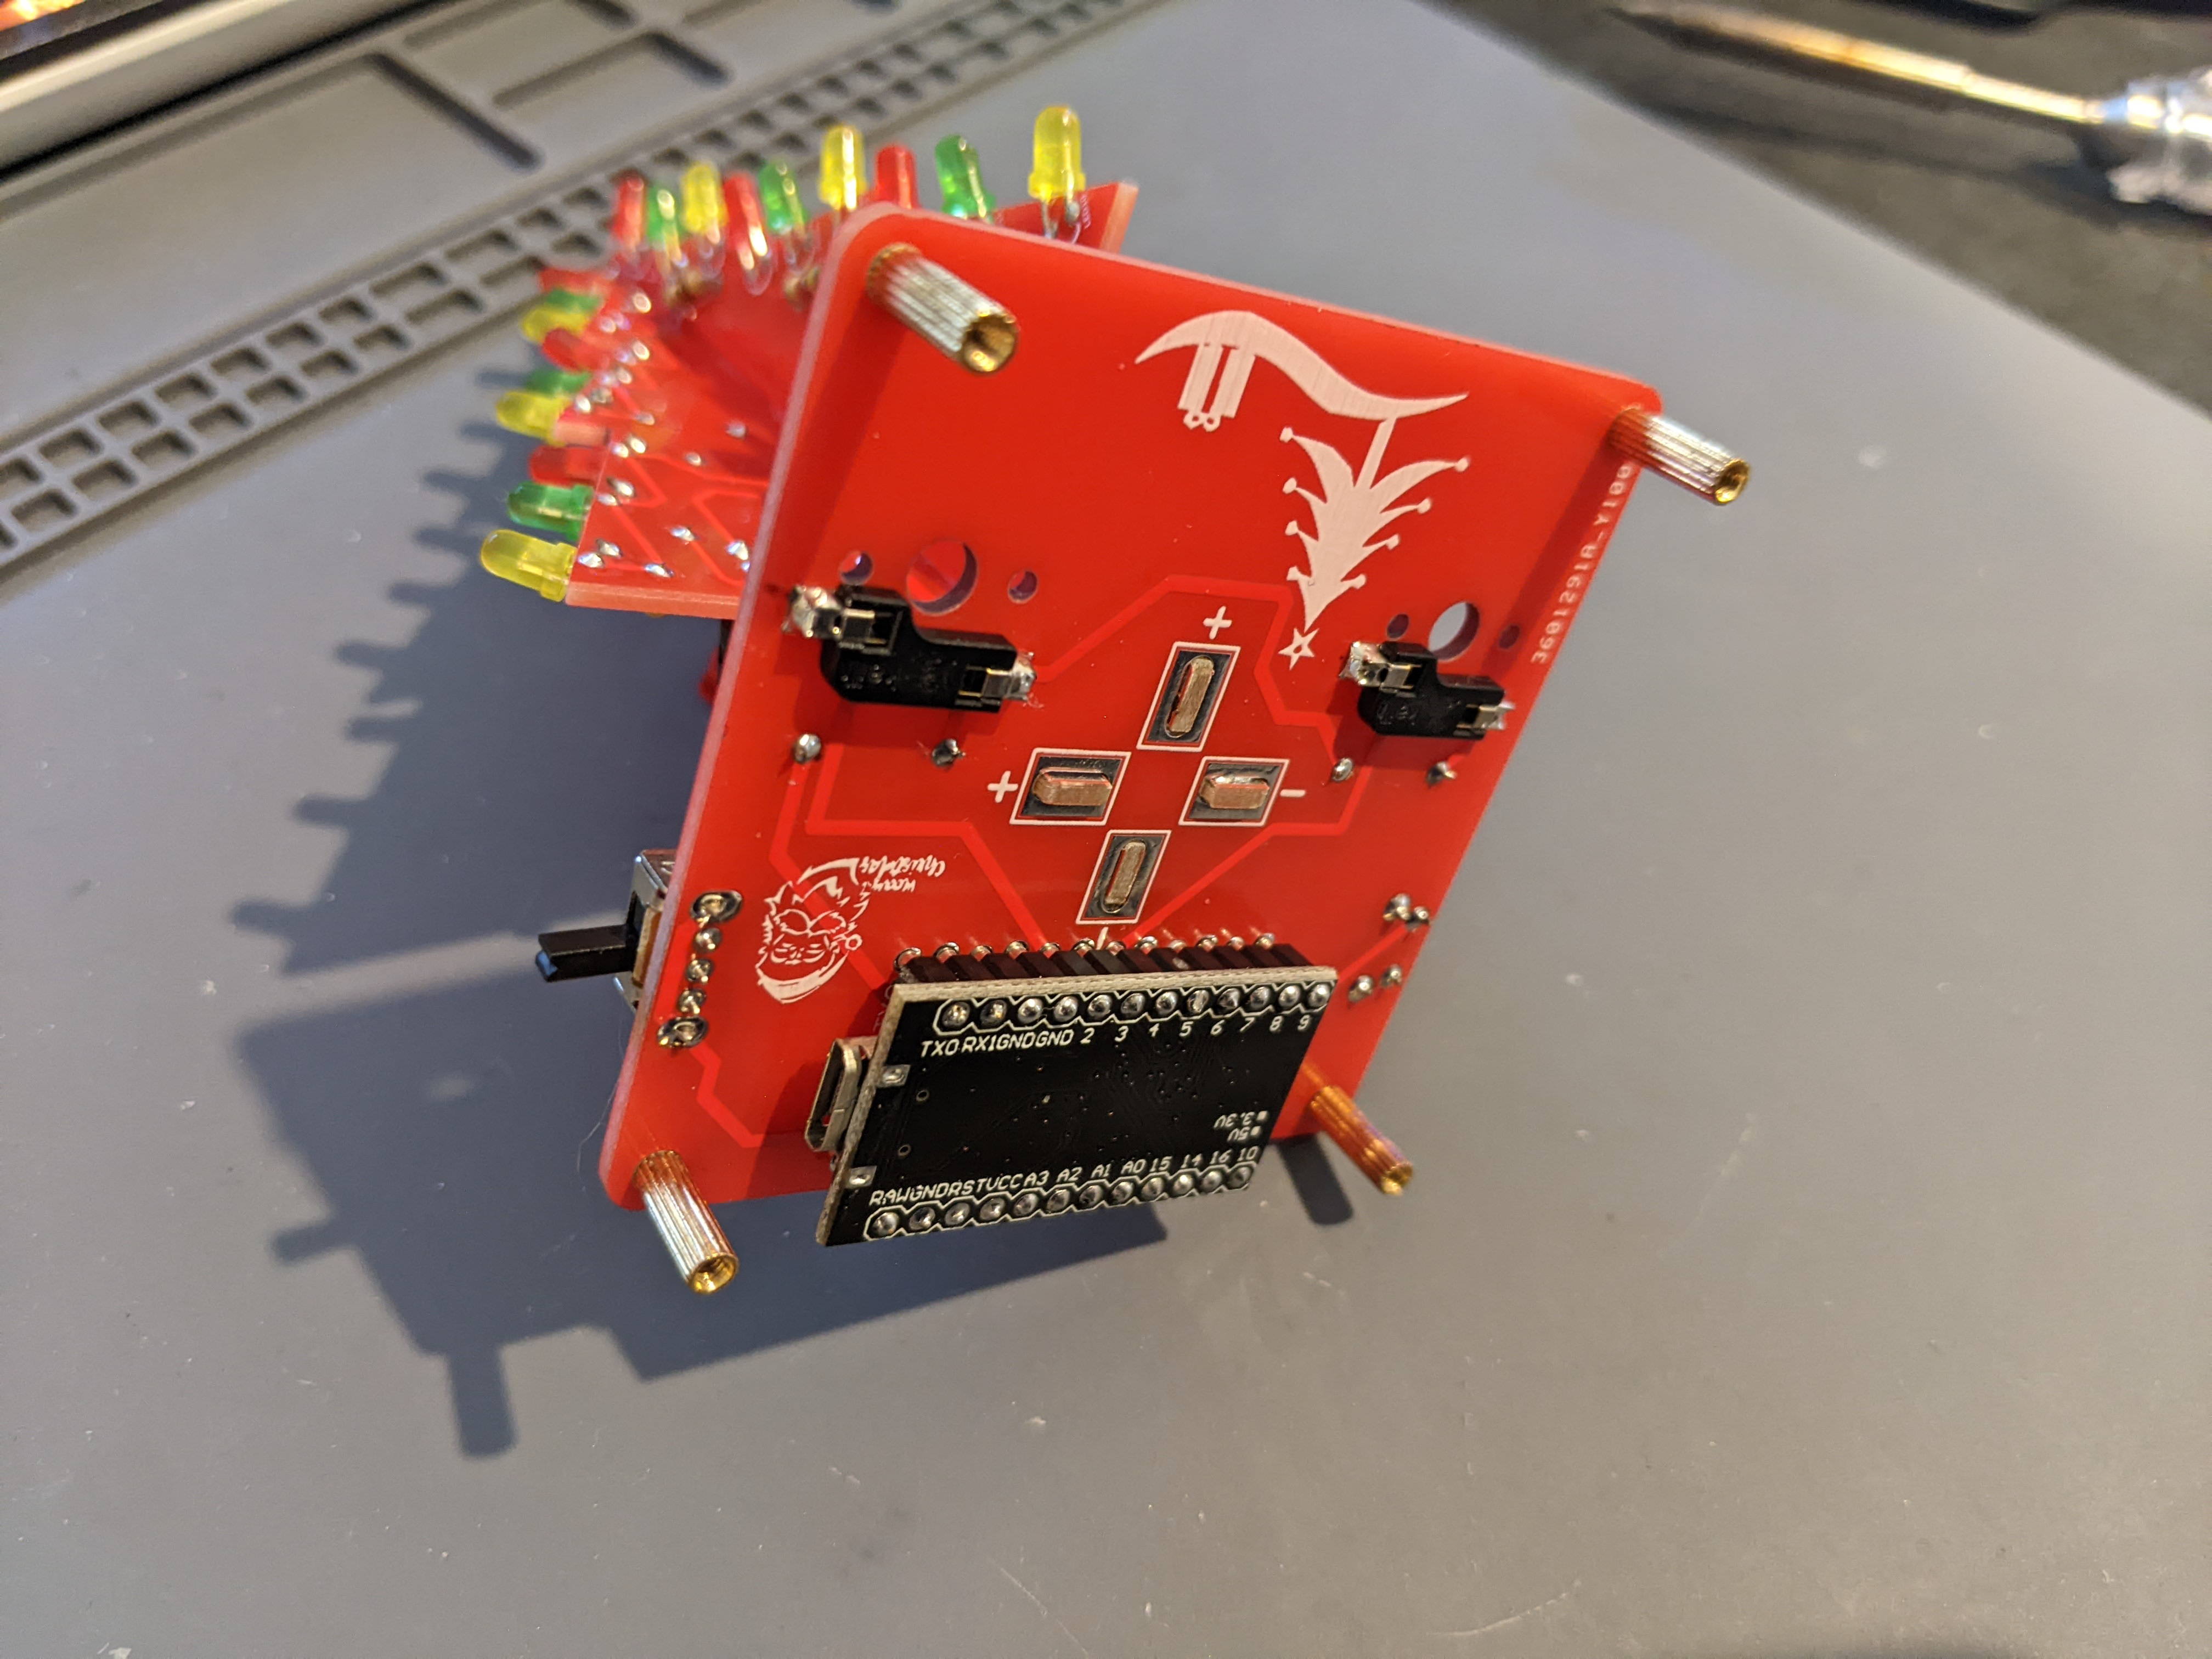

All Complete!